
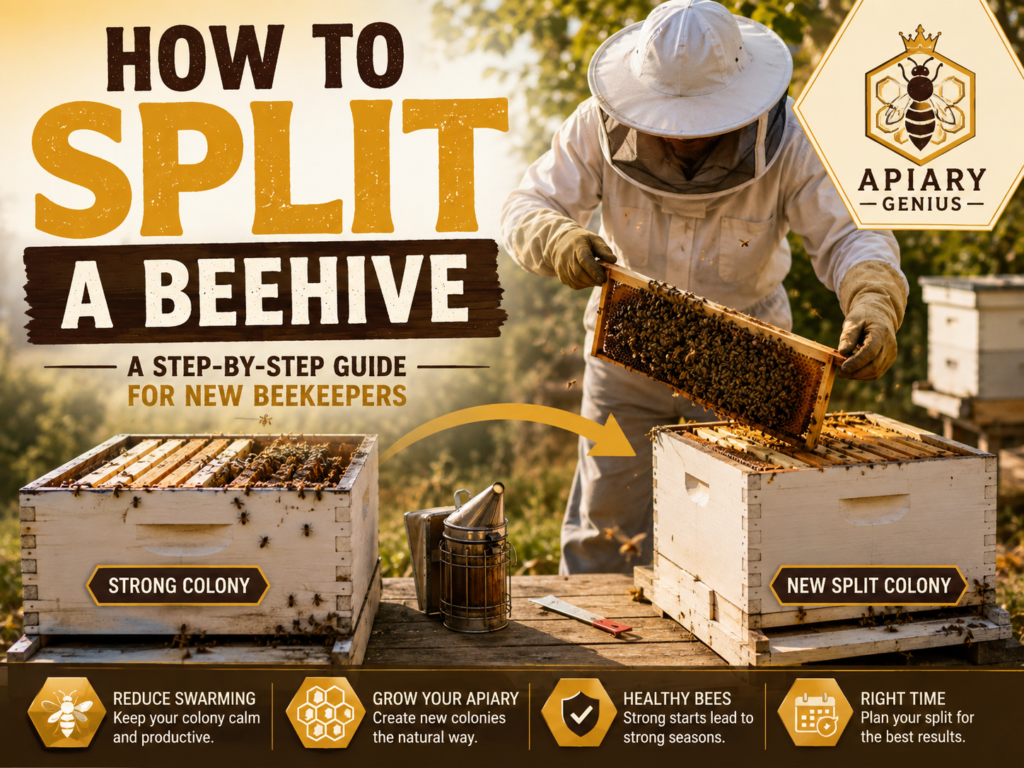
Learning how to split a beehive is one of the most useful skills you can develop as a beekeeper. A well-planned split can help you increase the number of colonies in your apiary, replace winter losses, create a nucleus colony, and reduce swarm pressure in a strong hive.
But splitting a hive is not as simple as moving half the frames into another box. Both colonies need enough adult bees, brood, food, and space to function independently. You also need a clear plan for the queen. One colony may keep the original queen while the other raises a replacement, receives a queen cell, or is given a purchased mated queen.
Timing matters just as much as technique. Splitting a colony that is too weak, doing it too early in cold weather, or leaving the new colony without the resources needed to become queenright can turn one healthy hive into two struggling ones.
This guide explains the process from beginning to end, including when to make a split, how to determine whether your colony is strong enough, what happens to the queen, how to make a nuc, and how to care for both colonies afterward.
Table of Contents
1. What Does Splitting a Beehive Mean?
Splitting a beehive means deliberately dividing one established honey bee colony into two separate colonies. Instead of allowing the colony to reproduce naturally through swarming, the beekeeper moves selected bees, brood, food stores, and sometimes the queen into another hive.
The result is two independent colonies, each of which must eventually have a functioning queen.
In a typical beehive split, the original queen remains with one group of bees while the second colony becomes temporarily queenless. The queenless colony can then raise a replacement queen from suitable young brood, receive a mature queen cell, or be given a mated queen.
There are many ways to perform a split, and experienced beekeepers often modify their methods according to their goals. Some divide a very strong colony into two substantial hives. Others remove only a few frames to create a smaller nucleus colony, or nuc.
The basic principle remains the same: you are dividing the biological resources of one colony in a way that gives both resulting colonies a reasonable chance of succeeding.
This is why simply dividing the frames equally is not necessarily a good split. A box containing plenty of honey but very little brood is not equivalent to one containing brood but too few adult bees to care for it. A successful split needs a balanced combination of resources.
2. Why Should You Split a Beehive?
Beekeepers split colonies for several reasons. Your reason for making the split can influence when you do it and how you distribute the queen, brood, and adult bees.
Increase Your Number of Colonies
One of the most obvious reasons for splitting a beehive is to expand an apiary without buying another complete colony.
A strong overwintered hive may contain enough bees and brood during spring growth to contribute resources to a second colony while remaining viable itself. If the new split develops successfully, one hive can eventually become two established colonies.
For a small-scale beekeeper, this can be a practical way to grow gradually using colonies that are already performing well under local conditions.
Replace Winter Losses
Even well-managed apiaries can lose colonies during winter. Strong survivors can sometimes be divided the following spring to help rebuild colony numbers.
This does not mean every surviving hive should automatically be split. The donor colony must first become sufficiently strong. A colony that merely survived winter but remains small needs an opportunity to recover before the beekeeper removes brood and bees from it.
Create Nucleus Colonies
A split does not have to become a full-sized hive immediately. You can use frames from an established colony to make a nuc.
Nucs are useful for expanding an apiary, maintaining a backup queen, replacing failed colonies, or developing smaller colonies that can later be transferred into standard equipment.
Manage Swarm Pressure
Swarming is the natural reproductive process of a honey bee colony. During favorable conditions, a strong colony may become crowded and begin raising new queens. The old queen can then leave with a large portion of the adult bees.
A properly timed split removes bees and brood and changes the organization of the colony. This can reduce the conditions contributing to swarming while allowing the beekeeper to retain the bees in managed equipment.
Splitting is particularly useful when a vigorous colony is approaching swarm season, although it is not a guarantee that a colony already committed to swarming will abandon the impulse.
Improve Queen Management
Splitting also gives the beekeeper an opportunity to establish a new queen in part of the colony. Instead of allowing the queenless half to raise its own queen, you may introduce a mated queen selected for desirable traits.
For beginners, however, the first objective should be straightforward: create two viable colonies and understand what each one needs to become and remain queenright.
3. When Is the Best Time to Split a Beehive?
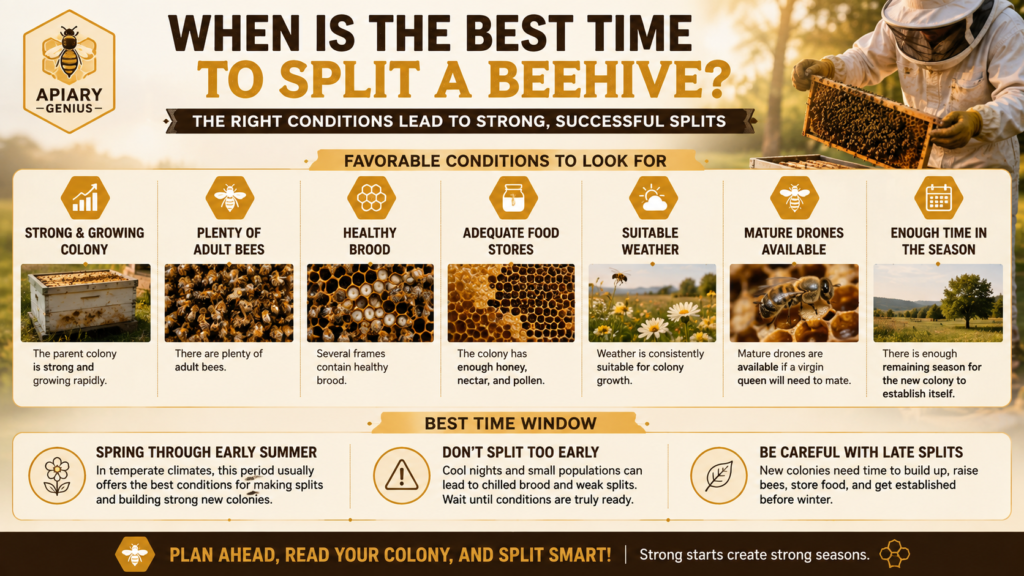
For many beekeepers in temperate climates, spring through early summer provides the best conditions for making splits. However, there is no universal date that works everywhere.
A beekeeper in the southern United States may be able to make successful splits considerably earlier than someone in a northern state or northern Europe. Local weather, forage cycles, colony development, and drone availability are more important than a date on the calendar.
Instead of asking only when to split a beehive, look for several favorable conditions occurring at the same time.
- The parent colony is strong and growing rapidly.
- There are plenty of adult bees.
- Several frames contain healthy brood.
- The colony has adequate honey or nectar and pollen.
- Weather is consistently suitable for colony growth.
- Mature drones are available if a virgin queen will need to mate.
- There is enough remaining season for the new colony to establish itself.
Why Spring Is Often Ideal
Spring colony growth naturally creates many of the conditions needed for successful splitting. Queens increase egg laying, brood populations expand, young workers emerge, and floral resources often become more abundant.
Strong colonies may also begin experiencing congestion as their populations increase, which is one reason spring splitting can serve both colony expansion and swarm management.
Making a split before a major nectar flow may give the colonies time to rebuild their populations, although dividing a colony can still reduce its immediate honey-production potential. If maximizing a honey crop is your primary objective, you need to balance that goal against your desire to increase colony numbers.
Do Not Split Too Early
A few warm afternoons do not necessarily mean spring has fully arrived.
A small split has fewer adult bees available to cover and warm brood. If temperatures fall sharply after the colony is divided, brood can become chilled. Early-season conditions may also provide too few mature drones for reliable mating of a newly raised queen.
Waiting until the colony and local environment are ready is usually safer than forcing an early split simply because you want another hive.
Be Careful With Late Splits
Late-season splits can work, particularly in areas with long warm seasons, but they have less time to develop.
A new colony may need to establish a queen, produce several rounds of workers, build or occupy sufficient comb, control pests, and accumulate adequate food before winter. The shorter the remaining season, the more demanding this becomes.
For beginners, a strong spring or early-summer colony generally provides a more forgiving opportunity than a marginal colony late in the year.
4. How to Know If Your Colony Is Strong Enough to Split
Colony strength is one of the most important factors in a successful split. A beekeeper may want two colonies, but dividing a weak hive can simply produce two weak colonies.
Before making the decision, perform a complete inspection of the potential donor colony.
Look at the Adult Bee Population
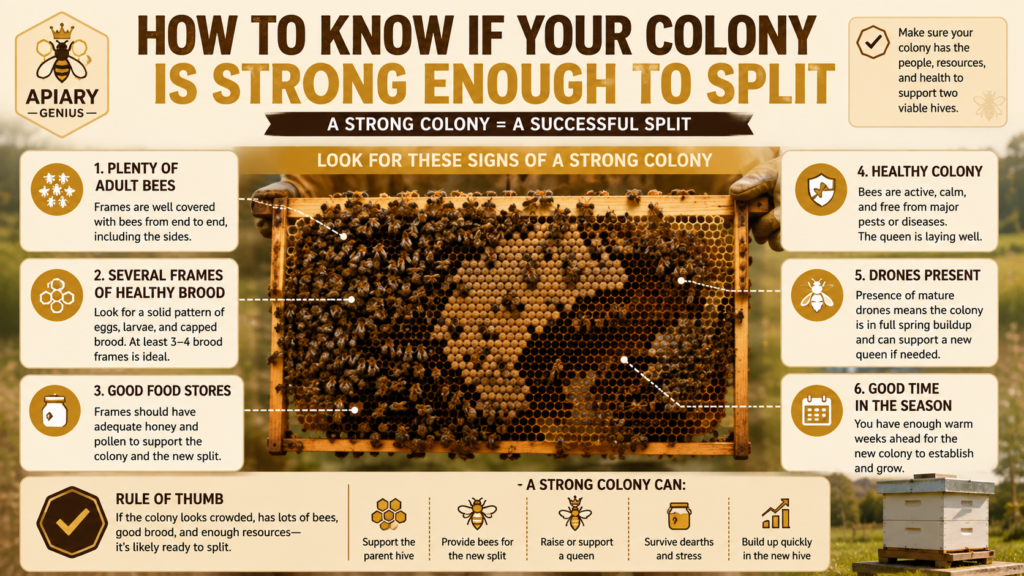
A strong colony should have a substantial adult population occupying much of the available hive space and covering the brood area well.
Remember that each resulting colony must perform all the normal jobs of a honey bee colony. Workers must keep brood warm, feed larvae, clean cells, defend the entrance, process food, build comb, and forage.
If removing several frames of bees would leave the parent colony sparsely populated, it is probably not ready.
Evaluate the Brood Nest
Look for multiple frames of healthy brood at different developmental stages.
Capped brood is especially valuable in a split because it represents workers that will emerge relatively soon and begin strengthening the colony. Open brood is important as well, particularly when the queenless portion will need to raise a replacement queen.
Do not judge strength from one unusually good frame. Evaluate the brood nest as a whole.
Check Food Stores
Both resulting colonies need carbohydrates and protein. Inspect the hive for honey or nectar and pollen that can be distributed between them.
Food requirements become especially important if weather deteriorates after the split or the colony is divided during a period of limited forage.
Assess Colony Health
A large population does not automatically mean a colony is a good candidate.
Check for signs of brood disease and consider current Varroa pressure and queen performance. Splitting a seriously unhealthy colony can spread problems into additional equipment and leave both resulting colonies less capable of recovering.
A split should come from a healthy, productive colony whenever possible.
Consider the Cost to the Parent Colony
Every frame of brood and every group of workers moved to the new hive is a resource removed from the parent.
Ask yourself a simple question: after I remove these resources, will the original colony still have enough bees, brood, food, and space to continue functioning strongly?
If the answer is uncertain, waiting another week or two for additional brood to emerge may be the better choice.
5. What You Need Before Splitting a Beehive
Prepare your equipment before opening the donor colony. Once brood frames are exposed and bees are being moved, you do not want to stop the process to search for missing equipment.
For a basic split, prepare:
- A complete second hive or appropriately sized nuc box
- A bottom board and cover
- Frames with drawn comb, foundation, or a combination of both
- A smoker
- A hive tool
- Protective clothing
- An entrance reducer when appropriate
- A feeder if supplemental feeding may be necessary
- Queen-introduction equipment if you are adding a purchased queen
Drawn comb is particularly useful because the bees can use it immediately for brood rearing and food storage. Foundation can certainly be used, but the bees must first produce wax and draw the comb.
You should also decide how the queen will be managed before you begin.
Will the original queen stay in the parent hive? Will she be transferred into the new split? Will the queenless colony raise a queen naturally, receive a queen cell, or receive a mated queen?
This decision affects which frames you move and what you should expect during the following weeks.
If possible, place and prepare the new equipment before opening the original colony. A calm, organized procedure reduces the time brood is exposed and makes it easier to keep track of the queen and transferred frames.
6. How to Split a Beehive Step by Step
There are several valid methods for how to split a bee hive. The following approach is designed to help a beginner understand the essential biological requirements rather than depend on a rigid formula.
The exact number of frames you move should be adjusted according to colony strength, hive configuration, local conditions, and whether you are making a full-sized split or a nuc.
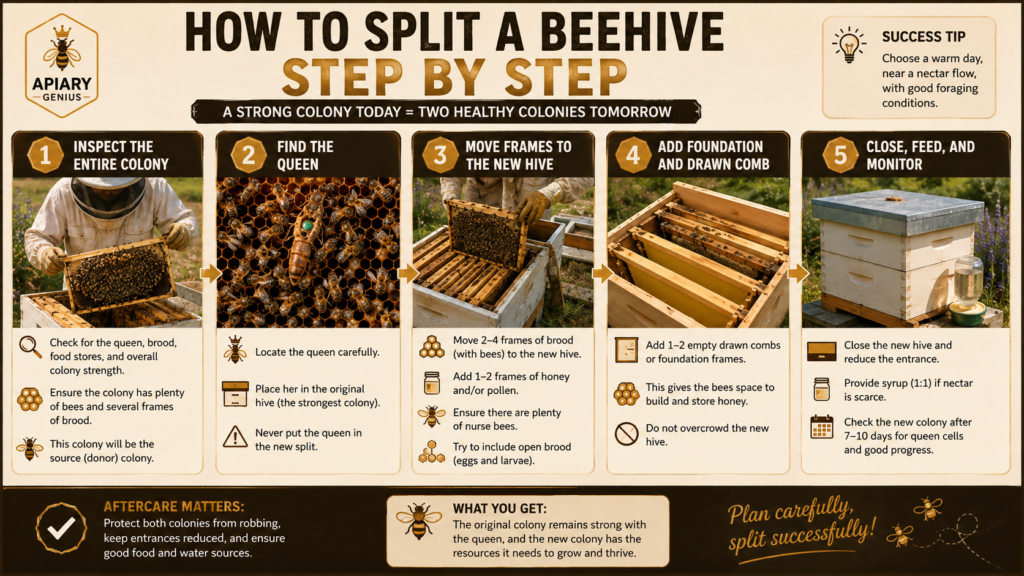
Step 1: Inspect the Entire Colony
Begin with a normal inspection on a suitable day.
Confirm that the colony is healthy, populous, and has enough brood and food to divide. Look at brood patterns, stored pollen and honey, available space, and the number of bees covering the frames.
Also check carefully for queen cells.
Empty queen cups alone do not necessarily mean the colony is preparing to swarm. Queen cells containing eggs or larvae are more significant, particularly when several are developing in a crowded, rapidly growing colony.
If you find advanced swarm cells, queen management becomes especially important because the colony may already be well into its swarm preparations.
Step 2: Find the Queen
For a beginner, finding the queen before transferring brood frames removes a major source of uncertainty.
Start by looking on frames containing eggs and young brood. Move slowly and inspect both sides carefully. A marked queen is usually much easier to locate.
Once you find her, keep track of her frame.
You do not necessarily need to pick her up. In many cases, moving the entire frame on which she is walking is safer and less stressful than physically handling her.
Step 3: Decide Which Colony Gets the Original Queen
Now follow the queen plan you made before opening the hive.
One straightforward method is to place the original queen and her frame into the new split while leaving suitable brood behind for the original colony to raise another queen. Another approach is to leave the queen in the parent colony and make the new split queenless.
Neither arrangement changes the fundamental requirement: one side has the original queen, while the other needs a reliable path to becoming queenright.
Step 4: Select Brood Frames
Choose brood according to the needs of the new colony.
A balanced split benefits from capped brood because new workers will emerge relatively soon. It may also need open brood.
If the queenless colony will raise its own queen, it must contain eggs or very young fertilized larvae suitable for queen rearing. A colony containing only capped brood cannot begin raising an emergency queen from that brood.
Keep brood frames together as much as practical so the bees can maintain a compact brood nest.
Step 5: Transfer Brood With Adhering Bees
Move the selected frames with the bees covering them, once you are certain where the queen is.
The young nurse bees on brood frames are extremely valuable to a new split because they feed larvae and help maintain the brood nest.
Avoid leaving brood exposed to cold wind or direct sun for longer than necessary. Transfer the frames efficiently and place them into the prepared hive.
Step 6: Add Food Resources
Both colonies need food.
Transfer appropriate frames containing pollen and honey or nectar so the new colony has resources available while it reorganizes and develops its foraging force.
Do not place food frames in a way that unnecessarily divides the brood nest. A compact arrangement makes it easier for a smaller population to care for brood.
Step 7: Add Empty Frames and Provide Space
Fill the remaining positions with appropriate frames.
If you have drawn comb, place useful empty comb where the queen can lay and workers can store incoming nectar. Foundation can occupy other available positions as appropriate.
Do not spread a small brood nest across an unnecessarily large area just to alternate brood with empty frames. A newly divided colony benefits from maintaining a manageable cluster.
Step 8: Establish the Queenless Colony’s Queen Plan
If one half is queenless, you now have three common options.
- Let the colony raise its own queen. It must have suitable eggs or very young larvae and enough nurse bees and resources.
- Introduce a mature queen cell. This shortens part of the queen-development process, although the virgin queen still needs to emerge and usually mate.
- Introduce a mated queen. This can shorten the brood interruption if she is accepted successfully.
If you are introducing a purchased queen, follow the queen producer’s introduction instructions rather than releasing her immediately without considering colony conditions.
Step 9: Account for Returning Foragers
One of the easiest details for a beginner to overlook is that experienced foragers remember the location of their hive.
If you place a new split beside the original hive, many older flying bees may return to the location they already know after foraging. This can cause one colony to receive more field bees than expected.
Some splitting methods deliberately use this behavior by positioning the queenright split at the original hive location. Other methods move one colony elsewhere in the apiary or to another apiary.
The important point is not that every split must be moved a fixed distance. It is that you should anticipate bee drift and returning foragers when deciding where the two colonies will sit.
Step 10: Close the Colonies and Let Them Settle
Once both colonies have the appropriate resources and queen plan, close the hives carefully.
A small split may benefit from a reduced entrance, particularly when robbing pressure is high. Make sure ventilation and entrance size remain appropriate for conditions.
Do not immediately begin reopening the hive every day to see what is happening. The bees need time to reorganize, and a colony raising a queen needs time for queen development and mating.
Step 11: Record the Split
Before leaving the apiary, record what you did.
At minimum, note:
- The date of the split
- Which colony has the original queen
- Which colony is queenless
- Whether the queenless colony has young brood, a queen cell, or an introduced queen
- Any feeding provided
- When the next meaningful inspection should occur
Good records become particularly valuable when several colonies are being managed at once.
7. What Happens to the Queen After a Hive Split?
The queen is central to what happens after a split.
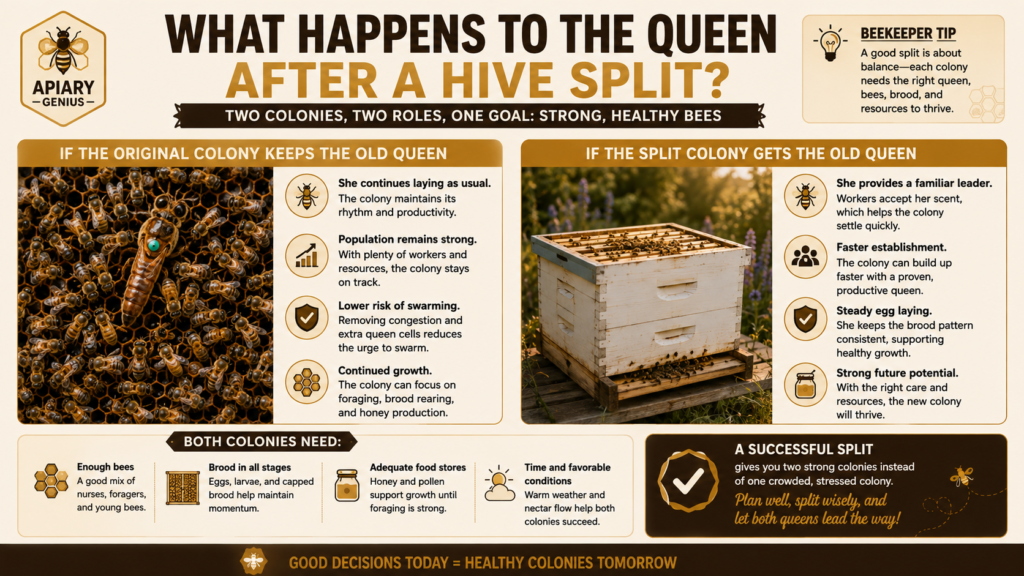
One colony usually retains the original laying queen. That colony can continue producing eggs with relatively little interruption, assuming the queen and colony remain healthy.
The other colony must establish another queen.
If the Bees Raise Their Own Queen
When workers recognize that their queen is gone, they can begin emergency queen rearing if suitable young female brood is available.
Queen and worker bees both develop from fertilized eggs. The developmental difference depends largely on how the selected larva is fed and housed. Workers choose very young larvae and provision them intensively with royal jelly while enlarging their cells into queen cells.
A honey bee queen takes approximately 16 days to develop from egg to adult. However, that does not mean you should expect a laying queen 16 days after making the split.
The selected brood may already be partway through development when you make the split. After the virgin queen emerges, she still needs time to mature. Under suitable conditions she then takes mating flights, returns to the colony, and eventually begins laying.
Weather can delay mating flights, and mating itself is not guaranteed to succeed.
This is why a naturally requeened split can remain without visible new eggs for several weeks.
If You Introduce a Mated Queen
Adding a mated queen can significantly shorten the time before normal egg laying resumes.
However, a new queen must be accepted by the workers. Simply dropping an unfamiliar queen into a queenless colony can result in her being killed.
Commercial queens are generally introduced in cages that allow colony odors and pheromones to become familiar gradually. Follow the supplier’s instructions and verify that the colony is genuinely queenless.
If You Use a Queen Cell
A mature queen cell provides another option. The colony does not need to begin queen rearing from a young larva, but the emerging virgin queen still has to mature and mate before she can establish a normal brood pattern.
Whatever method you choose, write it down. Knowing exactly how and when the colony was expected to become queenright prevents unnecessary inspections and confusion later.
8. How to Make a Nuc From an Existing Hive
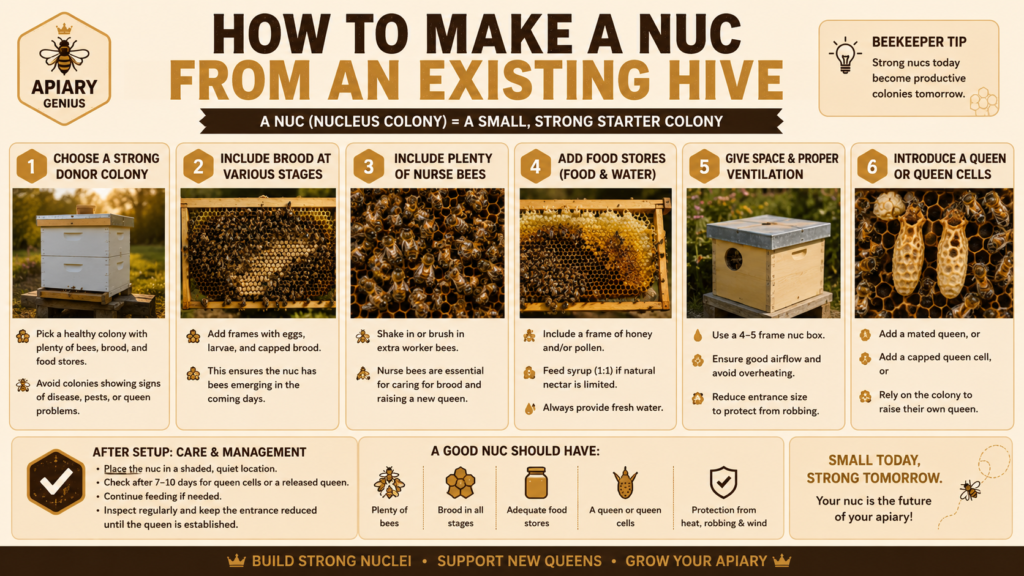
Learning how to make a nuc from a hive uses the same biological principles as making a larger split, but the new colony starts in a smaller space.
A nucleus colony is a small, functioning colony containing adult bees, brood, food, and a queen or a clear method of obtaining one.
A nuc box is useful because its smaller cavity is easier for a modest population to occupy and defend than a large hive filled mostly with empty space.
Choose Resources From a Strong Donor Colony
Do not weaken a marginal colony just to create a nuc.
Use a healthy donor hive with enough brood and adult bees to spare. Depending on your equipment, local conditions, and colony strength, nucs are commonly created with several frames rather than an entire brood box.
A practical nuc needs a balanced combination of brood, food, and bees rather than a specific frame formula that must be followed in every situation.
Include Brood at Useful Stages
Capped brood is valuable because emerging workers can quickly increase the nuc’s population.
If the nuc must raise its own queen, include eggs or appropriately young larvae as well.
A common mistake when learning how to make a nuc is giving a small colony more brood than its adult population can cover. Brood requires warmth and care, so match the brood area to the number of bees available.
Include Plenty of Nurse Bees
Move brood frames with adhering bees after verifying that you are not accidentally transferring the queen unless that is your intention.
Nurse bees are especially useful because they care for brood and many have not yet established the same foraging orientation as older workers.
Remember that some older bees transferred to a nuc in the same apiary may fly back to their previous location.
Provide Food
Include stored food appropriate to the nuc’s needs.
A small colony has a limited foraging force, and poor weather or a nectar dearth can quickly expose a shortage. Monitor stores after establishment and feed when conditions justify it.
Give the Nuc a Queen Plan
The nuc can receive the original queen, an introduced mated queen, a mature queen cell, or suitable brood from which it can raise a queen.
Each choice changes how quickly the nuc can begin expanding.
A nuc with a healthy laying queen can begin building its population relatively quickly. A nuc raising its own queen experiences a much longer brood interruption.
Move It Into a Full-Sized Hive When Necessary
A successful nuc should eventually become crowded.
As brood emerges and the queen expands her laying area, monitor available space. When the colony has developed enough strength, transfer the frames into appropriately sized full-hive equipment and provide additional room for growth.
Do not wait until severe crowding creates another management problem.
9. How to Care for a New Hive Split
The day you divide the hive is only the beginning. Management during the following weeks has a major influence on whether the split develops into a stable colony.
Monitor Food Without Overfeeding Automatically
Check whether the colony has adequate stores and whether natural forage is available.
If poor weather prevents foraging or the split has limited food, supplemental feeding may be useful. If the colony already has adequate stores and strong forage is available, feeding may not be necessary.
The goal is to respond to the colony’s actual condition rather than follow a rule that every split must always be fed.
Protect Small Colonies From Robbing
A newly created split has fewer guard bees than a strong established colony and may be more vulnerable to robbing, especially during nectar shortages.
Use an entrance size the colony can defend. Avoid spilling syrup around the hive, and do not leave honey, wet comb, or exposed feed where it can attract other colonies.
If you notice intense fighting at the entrance or bees aggressively attempting to enter cracks around the hive, investigate promptly.
Continue Varroa Management
A brood break caused by queen replacement can temporarily interrupt Varroa reproduction, but making a split does not guarantee mite control.
Continue monitoring the colony as part of your normal management program and make treatment decisions according to mite levels, season, local recommendations, and any products you use.
Do Not Inspect Without a Reason
Repeatedly opening a split because you are anxious about the queen can do more harm than good.
Your inspection schedule should reflect the queen strategy.
A colony receiving a purchased queen may need to be checked according to the introduction procedure. A colony raising a queen naturally needs enough time for queen development, emergence, mating, and the beginning of egg laying.
Know what biological milestone you are looking for before opening the hive.
Watch Population Changes
A split may initially appear to lose bees as older foragers return to their former location. This is not automatically a sign of failure.
Capped brood transferred into the split will gradually emerge and provide new workers. What matters is whether enough bees remain to cover the brood and maintain the colony during the transition.
Over the following weeks, a successful queen and emerging brood should begin changing the colony from a temporary division into a growing independent hive.
10. How Long Does a Hive Split Take to Establish?
The answer depends largely on what happens with the queen.
A split that receives an accepted mated queen can return to egg production much sooner than one that must raise a queen from young brood.
If the colony raises its own queen, several biological steps must occur:
- Workers select suitable young brood for queen rearing.
- The queen develops inside her cell.
- The virgin queen emerges.
- She matures inside the colony.
- Weather must permit mating flights.
- She mates successfully.
- She returns to the colony and begins laying.
- Her new worker brood develops and eventually emerges.
Queen development takes about 16 days from egg to adult. After emergence, a virgin queen normally needs additional time before mating. Poor weather can extend the process.
Even when you finally see eggs, the colony has not instantly regained the workers lost through the split. Worker brood takes about three weeks from egg to adult emergence.
This creates an important distinction.
Becoming queenright means the colony has established a functioning queen.
Becoming fully established means the colony has built a sustainable population, maintains healthy brood, occupies sufficient comb, has appropriate food stores, and can function as a robust independent colony.
The second process takes longer.
A mated-queen split under excellent spring conditions may progress rapidly. A naturally requeened split experiencing poor mating weather or limited forage may require considerably more time.
Judge progress by what is happening inside the colony rather than expecting every split to follow an identical calendar.
11. Common Beehive Splitting Mistakes to Avoid
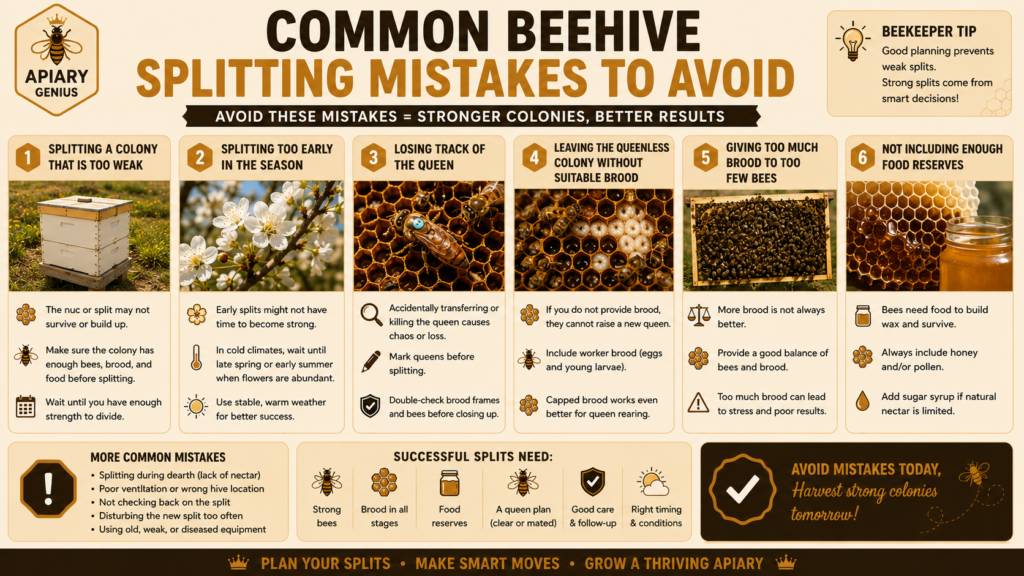
Most failed splits are not caused by one mysterious event. They are often linked to predictable management mistakes.
Splitting a Colony That Is Too Weak
This is one of the most important mistakes to avoid.
A weak colony needs its workers and brood to strengthen itself. Removing those resources can leave both halves unable to maintain normal colony functions.
Wait until you have enough strength to divide, not merely enough frames to physically fill two boxes.
Splitting Too Early in the Season
Early warm weather can create false confidence.
If nights remain cold, a reduced population may struggle to cover brood. If mature drones are not yet available, a virgin queen may have poor mating opportunities.
Use colony development and local conditions, not the calendar alone.
Losing Track of the Queen
Accidentally transferring the queen to the wrong box changes your entire plan.
For beginners, locating her before moving brood frames is worth the additional time. Once you know where she is, record which colony receives her.
Leaving the Queenless Colony Without Suitable Young Brood
If you expect a queenless colony to raise a queen, it needs appropriate young fertilized brood.
Capped worker brood can strengthen the future population, but it cannot be converted into a queen.
Giving Too Much Brood to Too Few Bees
More brood is not always better.
Brood requires a sufficient population of nurse bees for feeding and temperature regulation. This becomes particularly important during cool weather.
Create a compact, manageable brood nest that matches the adult population.
Forgetting About Returning Foragers
A box may look crowded with bees while you are making the split and appear much less populated later because experienced foragers returned to their familiar hive location.
Anticipate this when choosing where each colony will be placed.
Inspecting the Queenless Colony Too Often
Opening the hive repeatedly will not make a virgin queen mature or mate faster.
If the colony is raising its own queen, understand the timeline and give the bees time to complete it.
Ignoring Food Availability
A split has fewer foragers and may experience poor weather shortly after being created.
Check stores and respond when necessary rather than assuming the new colony will always collect enough food.
Ignoring Varroa and Disease
Creating another colony does not remove existing health problems.
Evaluate donor colonies before splitting and continue monitoring the resulting colonies afterward.
Making a Late Split Without a Realistic Winter Plan
A late split has less time to raise workers and accumulate food.
This does not mean late splits always fail, but climate and remaining season become increasingly important. Beginners in cold-winter regions should be especially cautious about creating small colonies late in the year.
12. Can Splitting a Hive Prevent Swarming?
Yes. Splitting can be an effective part of swarm management because it reduces colony population and congestion while separating the queen from part of the brood and bees.
In a natural swarm, the old queen leaves the original nest with a substantial portion of the workers while the remaining colony raises or completes the development of a replacement queen.
A managed split uses some of the same biological behavior while keeping both groups in beekeeper-controlled equipment.
Timing, however, is critical.
If you divide a strong colony before its swarm preparations become advanced, reducing congestion and redistributing brood and bees can substantially change the conditions driving swarm behavior.
If the colony already has developed queen cells, the situation requires more careful management. You need to know where the old queen is and which queen cells remain in each part of the split.
Simply removing a few frames or destroying visible queen cells does not guarantee that a colony strongly committed to swarming will stop. Honey bees may rebuild queen cells, and under some circumstances even a colony that has been split can still swarm.
For that reason, splitting should be viewed as one tool within good swarm management rather than a guaranteed cure.
Strong colonies should still be monitored for:
- Brood-nest congestion
- Insufficient storage space
- Rapid population growth
- Developing queen cells
- Changes in queen laying
- Overall colony organization during swarm season
A well-timed split can be especially valuable because instead of simply losing a swarm, the beekeeper uses the colony’s reproductive strength to create another managed colony.
13. Frequently Asked Questions About Splitting Beehives
Can You Split a Hive Without Finding the Queen?
Yes, some splitting methods allow experienced beekeepers to divide colonies without first locating the queen. However, finding her makes the process much easier to control, particularly for a beginner.
If you know exactly where the queen is, you also know which colony requires a replacement queen. That simplifies your follow-up management and reduces the chance of making incorrect assumptions later.
How Many Frames Do You Need to Split a Beehive?
There is no single frame number that works for every colony.
The correct amount depends on whether you are making a nuc or a larger split, the strength of the donor colony, the adult bee population, weather, available forage, equipment, and queen strategy.
A good split is defined by balanced biological resources, not simply by reaching a predetermined frame count.
How Many Brood Frames Should Go Into a Nuc?
A nuc commonly receives several frames that include brood and food, but the exact arrangement should match its size and the number of bees available to care for that brood.
Include enough capped brood to help build population and, when the nuc must raise its own queen, suitable young brood as well. Avoid transferring more brood than the adult population can adequately cover.
Can I Make a Nuc Without Buying a Queen?
Yes. A queenless nuc can potentially raise its own queen if it contains suitable eggs or very young fertilized larvae, enough nurse bees, and adequate resources.
The disadvantage is time. The colony must complete queen development, allow the virgin queen to mature and mate, and then wait for her to begin laying.
Introducing a mated queen can shorten that interruption if she is successfully accepted.
Should I Feed a New Hive Split?
Feed according to need.
If the colony has limited stores, poor forage, prolonged bad weather, or foundation that needs to be drawn, supplemental feeding may be useful. If the split has adequate food and strong natural forage is available, automatic feeding may not be necessary.
Monitor conditions rather than applying the same feeding rule to every split.
How Far Away Should I Move a Hive Split?
A split does not always have to be moved several miles away. Colonies can be divided and maintained within the same apiary.
However, older foragers tend to return to the hive location they already know. If both colonies remain nearby, plan for that population shift.
Moving a split to another apiary is one way to reduce the effect, while some splitting methods deliberately use the original hive position to attract returning foragers to a particular half.
Will a Queenless Split Make Its Own Queen?
It can if it has suitable young female brood and enough bees and resources to rear a queen.
The age of the brood matters. Workers need eggs or very young larvae; they cannot turn capped worker brood into a queen.
How Long Should I Wait Before Checking a Split?
The appropriate timing depends on the queen plan.
If you introduced a purchased queen, follow the introduction procedure and recommended checking schedule. If the colony is raising its own queen, give it enough time for queen development and mating before repeatedly searching for eggs.
Your inspection should have a specific purpose rather than simply satisfying curiosity.
What If I Cannot Find Eggs After the Split?
First consider the timeline.
If the colony is raising a queen naturally, several weeks without new eggs can be normal. A queen must develop, emerge, mature, mate, and begin laying.
If enough time has passed and you still find no evidence of a functioning queen, inspect more carefully for queen status and determine whether corrective action is necessary.
What Happens If the New Queen Fails?
Queen failure can happen. A virgin queen may fail to return from mating flights, weather may prevent successful mating, or an introduced queen may be rejected.
Your options depend on the season and strength of the colony. They can include introducing another queen, providing suitable young brood, adding a queen cell, or combining the failed split with a queenright colony.
Do not allow a weak queenless colony to decline indefinitely while waiting for a problem that cannot resolve itself.
Can You Split a Beehive More Than Once?
A very strong colony may sometimes contribute to more than one split during a productive season, but every division removes brood and bees.
Reassess the donor colony after each split. Do not make repeated divisions according to a predetermined schedule if the colony has not rebuilt enough strength.
Can You Split a Hive in the Fall?
It is possible under some climatic and management conditions, but the risks increase as the season becomes shorter.
The colony needs enough time to become queenright, produce workers, manage Varroa, and enter winter with an adequate population and food supply.
In cold-winter regions, strong spring and early-season splits generally provide beginners with a larger margin for error.
Will Splitting a Hive Reduce Honey Production?
It can, especially when a large number of workers and brood are removed shortly before or during an important nectar flow.
A beekeeper whose main goal is maximum honey production may manage splits differently from someone whose main goal is increasing colony numbers.
This is an important management trade-off: the biological resources used to establish another colony are resources that would otherwise contribute to the original hive.
14. Final Thoughts
Learning how to split a beehive gives you a powerful way to manage strong colonies instead of simply reacting when they become crowded or begin preparing to swarm.
A successful split can increase your colony numbers, replace losses, create a useful nuc, support queen management, and help reduce swarm pressure. But success depends on more than transferring frames from one box to another.
Start with a genuinely strong and healthy donor colony. Wait until weather, brood production, adult population, forage conditions, and drone availability support the process. Make sure both colonies receive enough bees, brood, food, and appropriate space. Most importantly, know exactly how each colony will remain or become queenright.
After the split, resist the temptation to interfere constantly. A colony that receives a mated queen may resume normal brood production relatively quickly, while a colony raising its own queen needs considerably more time. Understanding that biological timeline will help you distinguish a normal brood break from a genuine problem.
Your first split does not need to be complicated. Focus on colony strength, balanced resources, queen status, and careful follow-up. Once you understand those fundamentals, you can adapt the technique to different goals and colony conditions.
Done at the right time and with the right preparation, a hive split turns the strength of one thriving colony into the foundation for another—and gives you one of the most practical colony-management skills in beekeeping.