
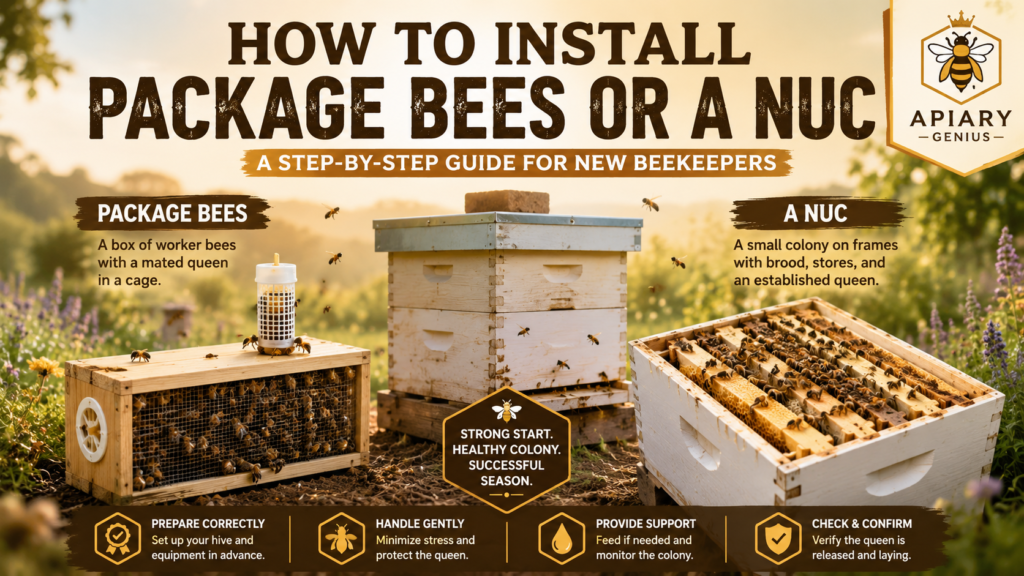
Starting a new honey bee colony is one of the most exciting moments in beekeeping, but those first few hours can also feel intimidating. Whether you ordered a package of bees or purchased a nucleus colony, giving the bees a calm, well-prepared start can make the transition much easier.
If you’re learning how to install package bees, the process is different from installing a nuc. Package bees arrive without established comb or brood, and the queen is usually protected in a separate cage. A nuc, by contrast, arrives as a small functioning colony with drawn comb, brood, food stores, workers, and typically an accepted laying queen.
This guide walks you through both methods step by step, from preparing your equipment and choosing the right installation conditions to checking queen acceptance and monitoring the colony during its first few weeks.
Table of Contents
Package Bees vs. a Nuc: What’s the Difference?
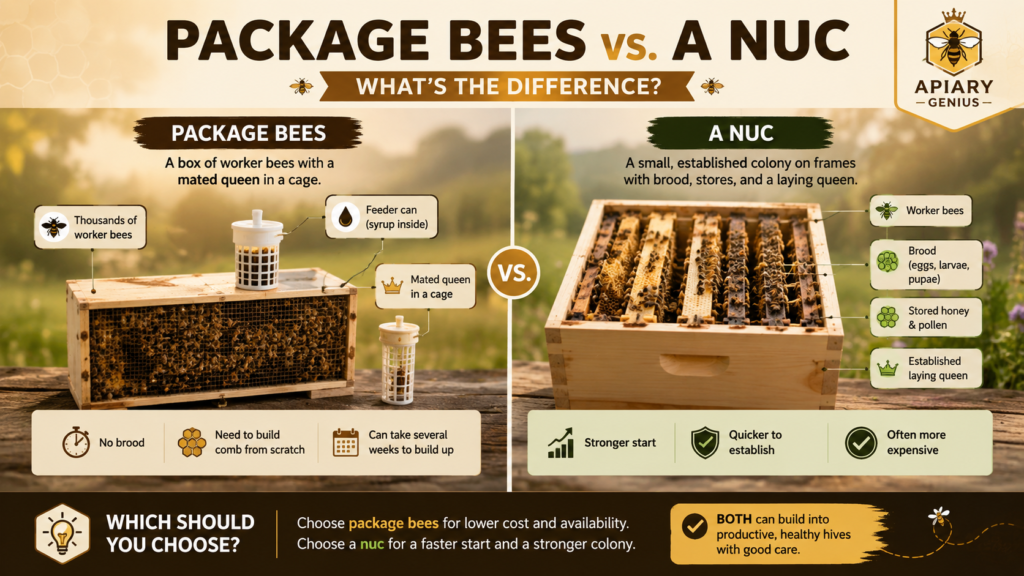
Package bees and nucs can both be used to establish a new colony, but what you receive—and what you need to do after arrival—is quite different.
Understanding that difference before installation helps you prepare the hive correctly and avoid unnecessary stress on the bees.
What You Get With Package Bees
A typical package contains several pounds of worker bees, a caged queen, and a feeder can or other temporary food source for transportation.
Unlike an established colony, package bees normally arrive without brood, drawn comb, or stored honey and pollen. The workers must accept their queen, begin drawing comb if you are using foundation, and establish the colony almost from scratch.
Because of this, learning how to install package bees involves more than simply putting bees inside a hive. Queen introduction, access to food, and minimal disturbance during the first few days are particularly important.
Packages can be installed on drawn comb when available, but many beginners start them on foundation. In that situation, the colony has considerably more work to do before the queen has enough prepared cells in which to lay.
What You Get With a Nuc
A nucleus colony, commonly called a nuc, is essentially a small working bee colony.
It usually contains several frames with a combination of brood, food stores, drawn comb, adult workers, and a laying queen. Exact frame numbers and configurations vary by supplier.
The major advantage is that the colony already has an established nest structure. Instead of introducing unrelated workers to a caged queen and waiting for comb construction, you are transferring an existing small colony into a larger hive.
This is why nuc installation is generally more straightforward than package installation.
Which Is Easier for a Beginner?
A healthy nuc is often easier for a new beekeeper to establish because much of the colony-building process has already begun. The queen is typically accepted and laying, brood is developing, and drawn comb is available.
Packages require a little more management during the initial establishment period. The bees need to settle into their new hive, accept and release the queen, build comb when necessary, and begin raising brood.
That does not make package bees a poor choice. Thousands of colonies are successfully started from packages. It simply means that a beginner should understand the additional steps involved.
What You Need Before Your Bees Arrive
Do not wait until the bees arrive to assemble equipment or decide where the hive will go. Complete as much preparation as possible beforehand so installation can be calm and efficient.
Prepare the Hive
Your hive should be fully assembled and positioned before the bees arrive.
For a typical Langstroth setup, have the bottom board, brood box, frames, inner cover, and outer cover ready. Check that the hive is stable and approximately level from side to side. A slight forward tilt can help rainwater drain away rather than collect inside.
If you’re still deciding which hive setup is right for you, see our guide to the different types of beehives and how they compare.
Make sure all frames fit correctly and can be removed without excessive force.
If you are installing package bees, you will need temporary space inside the brood box during installation. If you’re installing a nuc, prepare the box so the nuc frames can be transferred directly into it while preserving their original order.
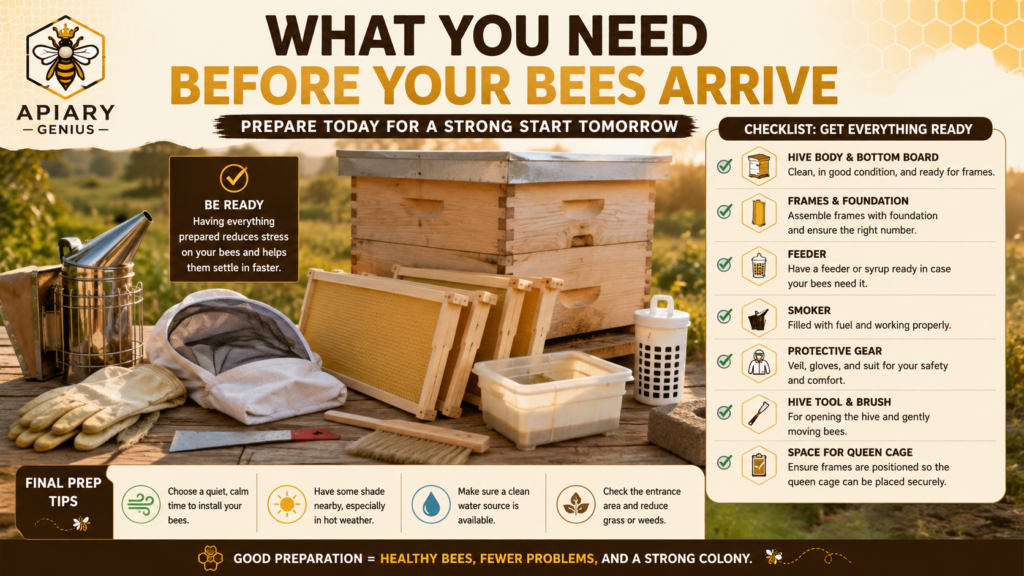
Gather Your Beekeeping Equipment
Have your basic equipment within reach before opening the package or nuc.
Useful items include:
- Protective clothing or a veil
- Hive tool
- Smoker
- Appropriate feeder if feeding will be necessary
- Sugar syrup prepared in advance when appropriate
- The complete hive and frames
A smoker can be useful, but avoid excessive smoke during installation. The goal is controlled handling, not forcing the bees around the hive unnecessarily.
Choose the Right Hive Location
The hive location should already be settled before installation day.
Choose a stable site with good drainage and reasonable protection from severe weather. The hive entrance should not point directly into an area with constant human or animal traffic.
Local climate matters. In very hot areas, afternoon shade may be beneficial, while colonies in cooler regions can benefit from morning sun. Good airflow is useful, but avoid sites exposed to persistent strong winds.
If you keep bees in a residential area, also consider the bees’ flight path. Fences, hedges, or other barriers can encourage bees to gain altitude after leaving the hive.
Have Feed Ready if Needed
New package colonies are frequently fed sugar syrup because they arrive without stored food and may need substantial energy to draw comb.
Feeding is especially useful when natural nectar is limited or when a package is installed onto undrawn foundation.
A nuc may or may not require supplemental feeding. Assess its food stores, local nectar availability, weather, and recommendations appropriate to your region.
Avoid treating feeding as an automatic year-round rule. The purpose is to support a colony when it needs additional food—not to feed unnecessarily when adequate natural forage and stores are available.
When Is the Best Time to Install Bees?
Installation conditions can affect how smoothly the bees settle into their new home.
Whenever possible, avoid making the transition more difficult with extreme temperatures or severe weather.
Best Time of Day
Late afternoon or early evening is often a practical time to install package bees. With daylight ending and flight activity declining, the colony has an opportunity to settle into the hive rather than immediately flying extensively.
For nucs, timing can be somewhat more flexible because the bees already recognize their frames, brood nest, and queen. Still, calm conditions are preferable.
Follow any specific instructions provided by your bee supplier, particularly when pickup and installation occur on the same day.
Weather Conditions to Avoid
Avoid opening and manipulating bees during severe weather whenever possible.
Heavy rain, strong wind, or unusually cold conditions can make installation more difficult. Extreme heat can also create additional stress, especially if bees remain confined in transportation containers.
If conditions are merely less than perfect rather than dangerous, the decision becomes more situational. Bees cannot remain confined indefinitely simply because the weather is not ideal.
What to Do if You Can’t Install Them Immediately
Install your bees as soon as reasonably practical while following your supplier’s handling instructions.
Do not leave a package or nuc inside a hot vehicle or exposed to direct sun. Overheating can quickly become dangerous.
A nuc needs adequate ventilation and careful temperature management during any delay. Packages also need suitable ventilation and should be protected from temperature extremes.
Because suppliers may use different shipping containers and feeding systems, follow the handling instructions that came with your bees rather than improvising a long-term storage method.
How to Install Package Bees Step by Step
Now we reach the most important part for anyone learning how to install package bees.
Exact package designs vary, so your supplier’s instructions take priority where they differ. However, the general process is similar.
Penn State Extension also provides a practical demonstration of installing packaged bees for new beekeepers.
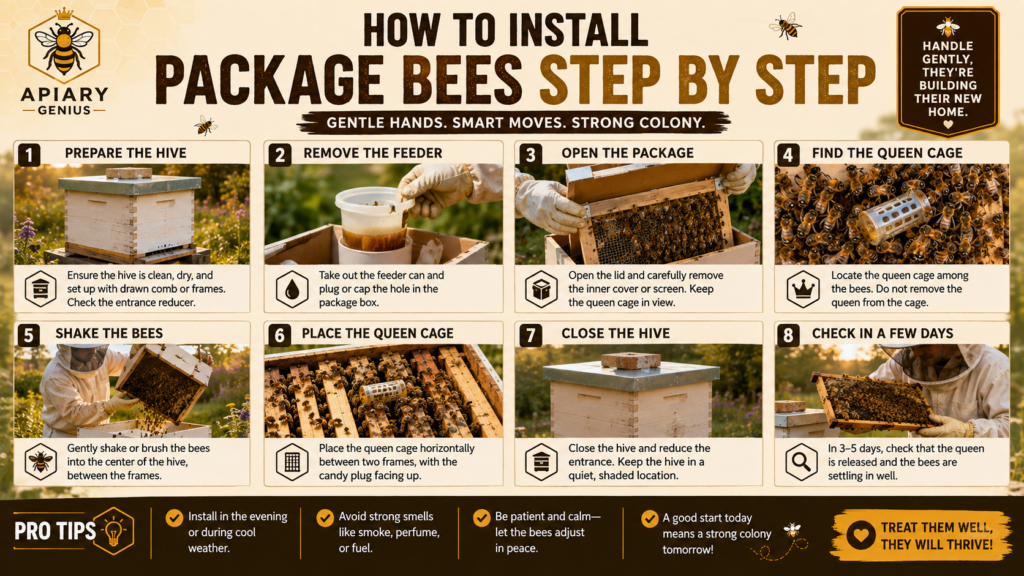
Step 1: Position the Package Near the Hive
Bring the package to the prepared hive and work calmly.
Open the hive and remove enough frames to create working space. Keep the frames nearby and protected so they can be returned once the bees and queen cage are positioned.
Before opening the package, take a moment to identify the feeder can and the queen cage location.
Avoid unnecessary shaking or rough handling.
Step 2: Remove the Feeder Can and Queen Cage
Depending on the package design, you will usually remove a cover to access the feeder can and queen cage.
Carefully remove the feeder can while preventing large numbers of bees from escaping through the opening.
Locate and remove the queen cage.
Do not automatically release the queen directly into the hive. Package workers may not yet recognize her as their queen, which is why gradual introduction is commonly used.
Step 3: Inspect the Queen Cage
Look through the cage and confirm that the queen appears alive.
You may also see a few attendant bees inside, depending on the cage design.
Queen cages use different release systems. Many have candy that workers gradually eat through, while others may require specific handling.
Follow the supplier’s instructions carefully. If there is a cork or cap protecting the candy end, make sure you understand which component should be removed before placing the cage in the hive.
If the queen appears dead, contact your supplier promptly rather than simply releasing the package and assuming the colony will solve the problem.
Step 4: Position the Queen Cage in the Hive
Secure the queen cage between central frames according to the cage and supplier instructions.
The bees must be able to access the cage so they can interact with and feed the queen while becoming accustomed to her pheromones.
Orientation can depend on the cage design. For that reason, avoid applying a single orientation rule to every queen cage. The candy exit must remain accessible, and the queen should not be placed where she could become trapped if attendants die or debris blocks an opening.
Make sure the cage cannot fall to the bottom of the hive when the frames are returned.
Step 5: Transfer the Bees Into the Hive
There are different accepted techniques for transferring package bees. A common method is to gently shake or pour the bees into the open space in the brood box.
A firm initial motion may be needed to dislodge the cluster, but avoid repeatedly slamming or violently shaking the package.
It is not necessary to remove every last bee.
Place the mostly empty package near the hive entrance so remaining bees can move toward their colony.
Some beekeepers use less disruptive installation techniques depending on hive configuration and supplier recommendations. Whichever method you use, the objective is the same: get the colony established around the queen while minimizing unnecessary stress.
Step 6: Replace the Frames and Close the Hive
Slowly return the removed frames.
Be careful not to crush clusters of bees between frames. Move deliberately and give bees time to move out of the way.
Once all frames are correctly positioned, install the feeder if you are using one and close the hive with the inner and outer covers.
At this point, resist the temptation to reopen the hive repeatedly just to see what the bees are doing.
Step 7: Provide Feed if Necessary
Packages installed on foundation often benefit from feeding because comb production requires substantial resources.
Sugar syrup can provide accessible carbohydrates while the colony establishes itself, particularly during poor weather or a nectar dearth.
For more detailed guidance on when, what, and how much to feed, see our complete guide to feeding bees throughout the year.
Keep the feeder from leaking or encouraging robbing. Internal or hive-mounted feeding systems can help reduce exposure compared with feeding methods that are easily accessed by bees from other colonies.
Continue to evaluate natural forage and colony progress rather than feeding indefinitely by habit.
How to Install a Nuc Step by Step
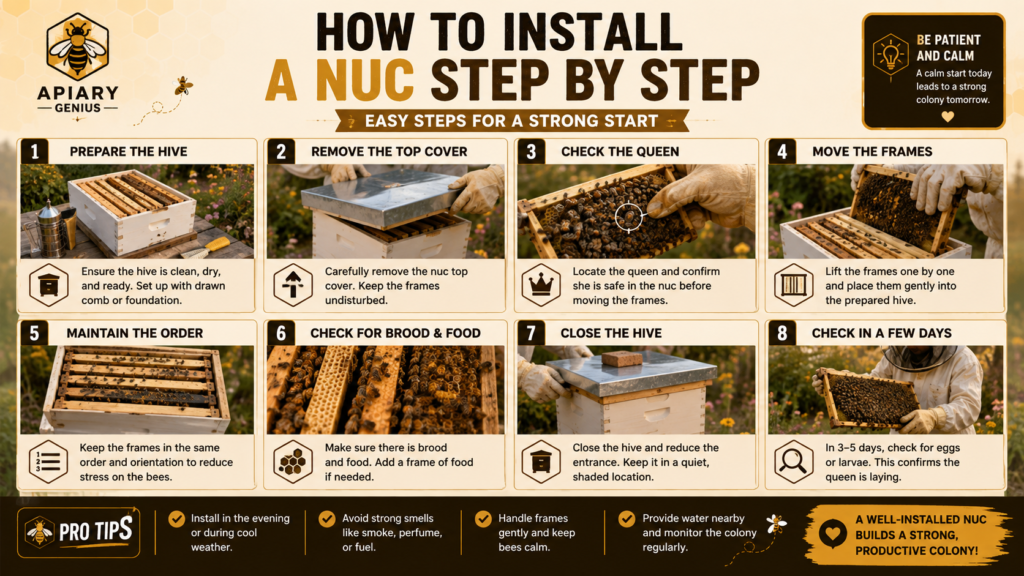
Installing a nuc is different because you are not pouring loose bees into an empty hive. You are transferring the core of an existing colony—including its brood nest and comb—into a full-size hive.
Step 1: Place the Nuc Near the New Hive
Bring the nuc to the hive location carefully.
If practical and consistent with your supplier’s instructions, positioning the nuc entrance near the location of the new hive entrance helps returning foragers orient to the correct area.
Prepare the full-size hive before opening the nuc so the transfer can be completed without unnecessary delays.
Step 2: Open the Nuc and Check the Colony
Open the nuc gently.
You do not need to conduct an exhaustive inspection during the transfer. Confirm that the colony appears normal and identify how the frames are arranged.
If you can easily confirm the queen or evidence of her activity without prolonging the process, that is useful. However, avoid spending excessive time searching for her while brood is exposed.
Handle the frames carefully because they may contain eggs, larvae, capped brood, honey, pollen, and the queen herself.
Step 3: Transfer the Frames in the Correct Order
This is one of the most important parts of learning how to install a nuc.
Move each nuc frame into the full-size hive while maintaining the same sequence and orientation it had in the nuc.
The brood nest is organized rather than random. Changing frame positions unnecessarily can disrupt its arrangement.
Transfer the frames one at a time and keep them together as a group, generally in the central portion of the brood box unless your equipment or local management practice requires otherwise.
Avoid rolling or crushing bees as frames are inserted.
Step 4: Add the Remaining Frames
Place your additional frames on the outside of the transferred nuc frames to fill the brood box.
The result should be a continuous group of nuc frames with the new frames filling the remaining space.
Push the frames together appropriately so spacing remains correct.
Do not scatter the original nuc frames throughout the box merely to encourage expansion. Preserving the existing brood nest is more important.
Step 5: Close the Hive and Let the Bees Settle
Once the frames are transferred, close the hive carefully.
The colony now has more room to expand while retaining its brood, food stores, workers, and queen.
If feeding is appropriate based on colony stores and local forage conditions, install the feeder. Otherwise, let the colony settle with minimal interference.
What to Do During the First Few Days
Successful installation does not end when you put the cover on the hive.
The first several days are an establishment period, especially for package bees.
Give the Colony Time to Settle
One of the easiest beginner mistakes is reopening the hive too frequently.
You may naturally want to check whether everything is working, but repeated disturbance can interfere with the colony’s settling process.
Package bees in particular need time to cluster around the queen cage, become accustomed to the queen, and begin establishing themselves in the hive.
Observe from outside unless there is a clear reason to intervene.
Check That the Queen Has Been Released
With a package colony, queen release is a critical milestone.
Depending on the cage system and supplier instructions, you may need to check after several days to confirm that the queen has been released.
If she is still inside, do not automatically release her by hand. Determine why she has not been released and consider the bees’ behavior toward the cage.
Calm workers attending the cage are different from workers aggressively biting or tightly mobbing it.
Queen introduction is one situation where patience can prevent a costly mistake.
Keep Feed Available When Needed
If you are feeding a new package, monitor the feeder without unnecessarily dismantling the brood nest.
The colony may consume syrup quickly while drawing comb.
A nuc with sufficient stores during a strong nectar flow may require little or no supplemental feed. Conversely, a small nuc facing prolonged poor weather or a nectar shortage may benefit from support.
Base the decision on conditions rather than the calendar alone.
Watch the Entrance Without Disturbing the Hive
You can learn a surprising amount without opening the hive.
Normal activity may include bees making orientation flights, workers entering and leaving the hive, and eventually foragers returning with pollen.
A quiet entrance does not automatically mean something is wrong, especially during cool or rainy weather.
Look for patterns rather than reacting to a single observation.
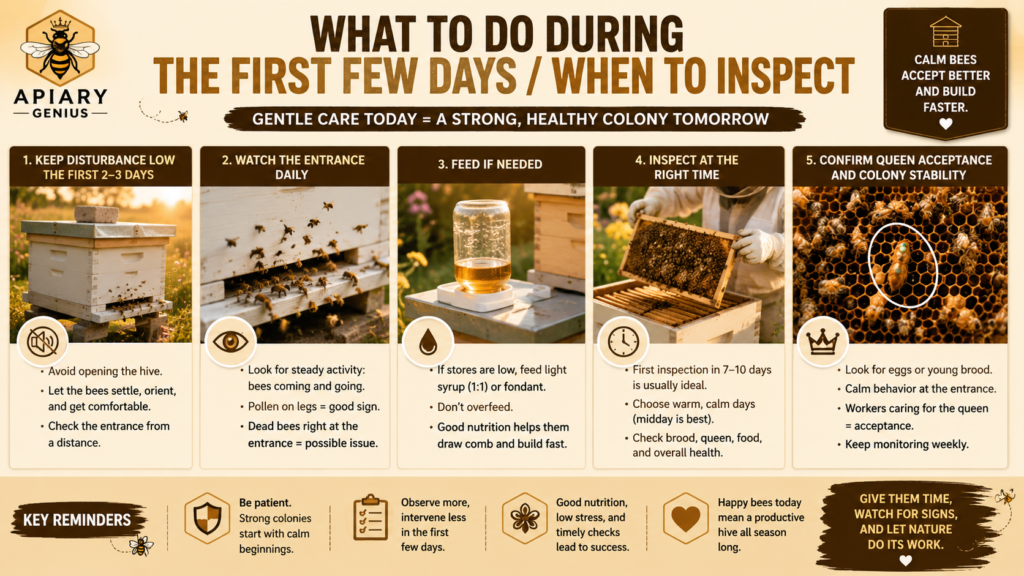
When to Inspect the New Colony
The timing of the first inspection depends partly on whether you installed a package or a nuc and on what needs to be verified.
The goal is to obtain useful information without repeatedly disturbing a colony that is still establishing itself.
Your First Inspection
For package bees, an early check is commonly used to verify queen release according to the supplier’s recommended schedule. A more complete inspection can follow after the colony has had time to settle.
During that inspection, look for signs that the queen is present and functioning.
For a nuc, you can generally allow the colony several days to adjust before conducting a normal inspection unless there is a specific concern.
For more guidance on choosing safe inspection conditions, see our guide to the best time to inspect a beehive.
Avoid turning every quick check into a full frame-by-frame inspection.
Signs the Queen Has Been Accepted
Finding the queen is reassuring, but you do not always need to see her.
Eggs and young larvae are strong evidence that a queen has been laying recently.
A developing brood pattern provides additional information as the colony progresses.
For a package installed on foundation, remember that the queen cannot lay extensively until workers have prepared enough comb. Therefore, colony development may initially look slower than in a nuc that arrived with drawn comb and brood.
Signs the Colony Is Establishing Successfully
Encouraging signs include:
- Comb being drawn where needed
- Eggs and developing brood
- Workers bringing in pollen
- Normal entrance activity during suitable weather
- Adequate food availability
- Expansion of the colony over time
No single observation tells the entire story.
Evaluate the colony’s progress across successive inspections rather than expecting a newly installed package to look like an established hive immediately.
Warning Signs That Need Attention
Investigate if you find persistent signs such as no evidence of a functioning queen, dwindling adult bee numbers, lack of food, unusual brood conditions, excessive dead bees, or obvious pest and disease problems.
Not every irregularity is an emergency.
For example, a package requires time to produce its first new workers because it begins without brood. Understanding the normal timeline helps prevent unnecessary interventions.
If you suspect disease or poisoning, seek guidance from an experienced local beekeeper, extension specialist, apiary inspector, or other qualified resource.
Common Mistakes When Installing Package Bees or a Nuc
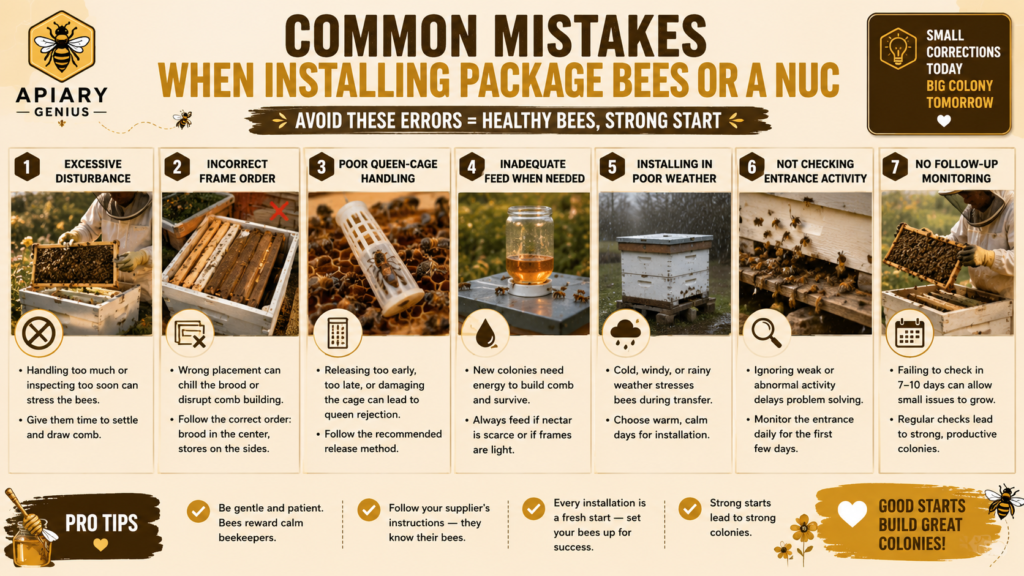
Knowing how to install package bees or a nuc is partly about following the correct steps—and partly about avoiding actions that interfere with the colony during a vulnerable transition.
Releasing the Queen Too Quickly
Directly releasing a package queen before the workers have accepted her can put her at risk.
The queen cage exists to provide a controlled introduction period. Follow the release method recommended for your cage and package.
Do not rush the process simply because you want to see the queen walking on the comb.
Installing Bees in Poor Weather
Severe cold, heavy rain, high winds, and extreme heat can complicate installation.
Check the forecast before pickup or delivery and have a plan.
At the same time, avoid keeping bees confined for an excessive period while waiting for perfect weather. Supplier instructions and the actual condition of the bees should guide your decision.
Disturbing the Colony Too Soon
Constantly opening the hive is rarely helpful.
Every inspection disrupts the colony to some degree, and newly installed bees have important work to do.
Inspect with a purpose. Know what you are looking for before removing frames.
Forgetting to Feed When Food Is Scarce
A package has no stored honey when it arrives.
If there is little nectar available and the bees need to build comb, lack of food can seriously slow establishment.
Monitor conditions and feed when appropriate.
However, do not turn this advice into permanent feeding regardless of nectar flow or colony stores.
Changing the Nuc Frame Order
A nuc’s frames contain an organized brood nest and food arrangement.
Randomly separating or reversing them during installation can disrupt that structure.
Transfer the frames in their existing sequence and orientation unless you have a specific management reason to do otherwise.
Leaving Too Much Empty Space
A small colony must regulate the temperature and defend the space it occupies.
Give it the equipment it needs to grow, but avoid assuming that adding large amounts of unnecessary hive volume automatically helps.
Expansion should match colony strength and your hive management system.
Package Bees vs. Nuc: What to Expect in the First Few Weeks
A package and a nuc may begin on the same installation day but develop differently.
A package starts with adult workers and a queen but no brood of its own. Workers may first need to build comb, and then the queen begins laying. Even after eggs appear, it takes time before those developing bees emerge as new adult workers.
This creates a period when the package population can temporarily decline before the first new generation emerges.
A nuc starts ahead because it already contains brood in multiple stages, drawn comb, and an established queen. New workers can begin emerging sooner after installation, allowing the colony to expand more continuously.
Do not compare the two hives day by day and assume the package is failing simply because the nuc grows faster.
Instead, judge each colony according to its starting point and look for steady progress.
Frequently Asked Questions
How long does it take package bees to settle into a hive?
Initial settling begins quickly, but establishing a functioning colony takes much longer. During the first few days, workers cluster in the hive, become accustomed to the queen, and begin working on comb. Brood production and population growth then develop over the following weeks.
How long should you wait before inspecting package bees?
Avoid conducting unnecessary full inspections immediately after installation. Follow the supplier’s instructions for checking queen release, which commonly requires an early check after a few days. A more complete inspection can be performed once the bees have had time to settle and the queen has had an opportunity to begin laying.
Should you feed package bees after installation?
Package bees are commonly fed sugar syrup after installation, particularly when placed on foundation, during poor weather, or when natural nectar is scarce. Feeding supports comb construction and provides energy while the colony becomes established.
The need and duration depend on forage, weather, comb availability, and colony progress.
Do you need to feed a nuc after installation?
Not always.
A nuc already contains some stored food and drawn comb, but its reserves can be limited. Supplemental feeding may be useful during a nectar dearth, prolonged bad weather, or when stores are insufficient.
Evaluate the colony and local conditions rather than feeding automatically.
How long does it take for a package queen to be released?
Release timing depends on the queen cage and introduction method. Candy-release systems are designed to give workers time to become accustomed to the queen while gradually opening the exit.
Follow the supplier’s instructions and check the cage at the recommended time rather than assuming every queen should be released after an identical number of hours or days.
Can you install bees in the rain?
Light, manageable conditions may not make installation impossible, but heavy rain and severe weather are best avoided when practical.
Protect bees and exposed brood from getting wet and chilled. If weather is poor, follow your supplier’s recommendations for temporary handling rather than leaving bees in unsafe transportation conditions.
What happens if the queen is dead on arrival?
If you discover that the package queen is dead before installation, contact the supplier as soon as possible.
Do not assume the colony can simply continue normally without her. The appropriate solution may involve obtaining a replacement queen, and the supplier may have a specific replacement policy or instructions.
Keep the package colony together and follow qualified guidance while the queen problem is resolved.
Final Thoughts
Installing your first bees becomes much easier once you understand that package bees and nucs have different starting needs.
When learning how to install package bees, focus on careful queen introduction, adequate food when needed, and giving the colony enough time to establish comb and brood. With a nuc, your main task is to transfer an already functioning miniature colony while preserving the arrangement of its frames and brood nest.
Prepare everything before the bees arrive, handle them calmly, inspect with a clear purpose, and judge progress over time rather than interfering at every opportunity.
A careful installation does not guarantee that a colony will never encounter problems, but it gives your new bees the stable start they need to begin building a strong hive.