
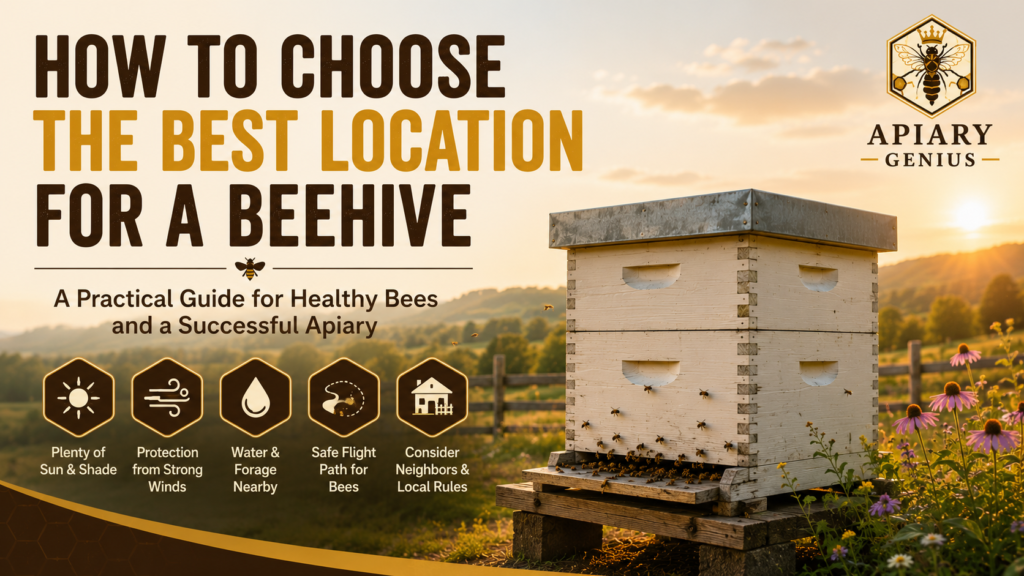
Choosing the best location for a beehive is one of the most important decisions you will make before installing your bees. A hive can often survive in a less-than-perfect spot, but good placement makes it easier for the colony to regulate temperature, stay dry, forage efficiently, and avoid unnecessary disturbance.
Location also affects the beekeeper. A hive that is difficult to reach, sits on wet ground, faces a busy walkway, or receives harsh weather can turn routine inspections into a problem. In a backyard, poor placement can also create conflicts with neighbors, pets, or people who regularly pass through the bees’ flight path.
The good news is that you do not need a perfect property. Honey bees are adaptable, and suitable hive locations can be found in suburban yards, rural properties, farms, and many other settings. The goal is to balance sunlight, drainage, wind protection, forage, water, safety, and accessibility.
This guide will help you evaluate those factors and choose the right spot before your bees arrive.
Table of Contents
Why Beehive Location Matters
A beehive is not simply a wooden box that can be placed anywhere there is enough room. The colony inside must maintain a relatively stable nest environment while thousands of workers regularly travel between the hive and surrounding resources.
The location can influence how much environmental stress the colony must manage. For example, a hive on poorly drained ground may be exposed to persistent dampness, while one in an extremely exposed location may receive strong winds. At the other extreme, a hive placed in intense summer sun in a hot climate may require more effort from the colony to cool the nest.
Good placement also makes routine management easier. You will need to visit the hive repeatedly for inspections, feeding when necessary, swarm management, adding or removing boxes, pest monitoring, and eventually harvesting honey. Honey supers can become heavy, so carrying equipment across a long, steep, muddy, or obstructed route quickly becomes inconvenient.
Safety is equally important. Bees develop regular flight paths as they leave and return to the colony. If the entrance points directly toward a doorway, sidewalk, children’s play area, livestock enclosure, or another frequently used space, bees and people are more likely to cross paths.
The best location therefore benefits both the colony and the people around it.
What Is the Best Location for a Beehive?
For many situations, a good beehive location has morning sunlight, protection from strong winds, dry and well-drained ground, nearby water and forage, a safe flight path, and enough space for the beekeeper to work comfortably.
The hive entrance is often oriented toward the east, southeast, or south when practical. Morning sunlight can warm the hive earlier in the day, while southern exposure can be useful in cooler climates. However, compass direction should not override more important considerations such as safety, drainage, extreme heat, or the physical layout of the property.
There is no single placement formula that works everywhere.
A beekeeper in northern Europe may benefit from maximizing solar exposure and protecting the colony from cold prevailing winds. Someone keeping bees in a hot part of the southern United States may need to think more carefully about intense afternoon heat. An urban beekeeper may prioritize flight paths and neighboring properties, while a rural beekeeper may focus more heavily on forage, agricultural pesticide exposure, and vehicle access.
Instead of looking for one universal “perfect spot,” evaluate the entire site.
Choose the Right Amount of Sun and Shade
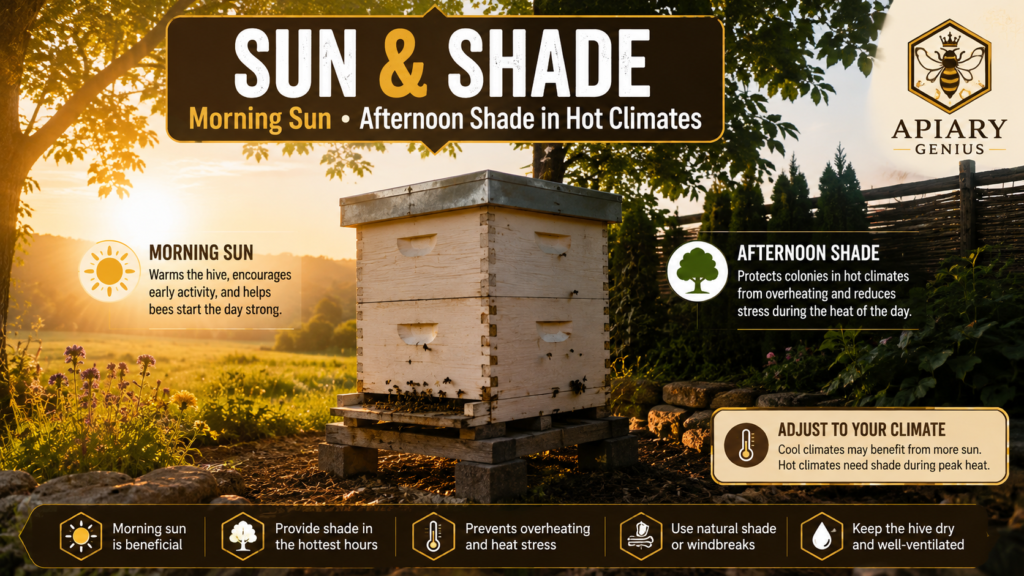
Sun exposure is one of the most commonly discussed factors in hive placement, but advice about it can appear contradictory. Some recommendations favor substantial sunlight, while others recommend shade during the hottest part of the day.
Both can make sense depending on climate and local conditions.
Morning Sun
Morning sunlight is generally beneficial because it warms the hive as the day begins and can encourage earlier activity. An eastern or southeastern exposure often provides this advantage.
A site that remains deeply shaded well into the morning may stay cooler and damper than a nearby location receiving early sunlight.
Morning sun becomes especially valuable in cooler climates and during cooler parts of the year, when additional warmth can help the colony begin daily activity.
When comparing two otherwise similar locations, the site receiving morning sun is usually worth serious consideration.
Afternoon Shade in Hot Climates
More sunlight is not automatically better in every climate.
During very hot weather, colonies must actively regulate the temperature inside the hive. Workers collect water and use evaporation and airflow to help cool the colony. When temperatures are extreme, bees may also gather outside the entrance in a behavior known as bearding.
In regions with intense summer heat, particularly where hot afternoon sun strikes the hive for hours, partial afternoon shade can reduce some of that heat exposure.
A tree, building, or other appropriately positioned feature may provide useful afternoon protection while still allowing the hive to receive morning sunlight.
However, avoid turning heat protection into permanent deep shade. A dark, damp location under dense vegetation can introduce different problems.
How Climate Changes the Ideal Exposure
Think of sunlight as a factor that should be adjusted to your climate rather than followed as a rigid rule.
In cool or cold climates, prioritize good solar exposure, particularly morning and winter sun.
In temperate climates, morning sun with reasonable daytime exposure often provides a useful balance.
In very hot climates, morning sun combined with some protection from intense afternoon heat may be preferable.
Local humidity matters too. In hot, humid conditions, evaporative cooling is more difficult for bees than it is in hot, dry air.
Before selecting a site, observe it at several times during the day. A location that looks pleasantly shaded at 9 a.m. might receive intense sun at 4 p.m., while another may remain damp and shaded almost all day.
Protect the Hive From Strong Winds
Honey bees need ventilation, but that does not mean the hive should be exposed to strong, persistent winds.
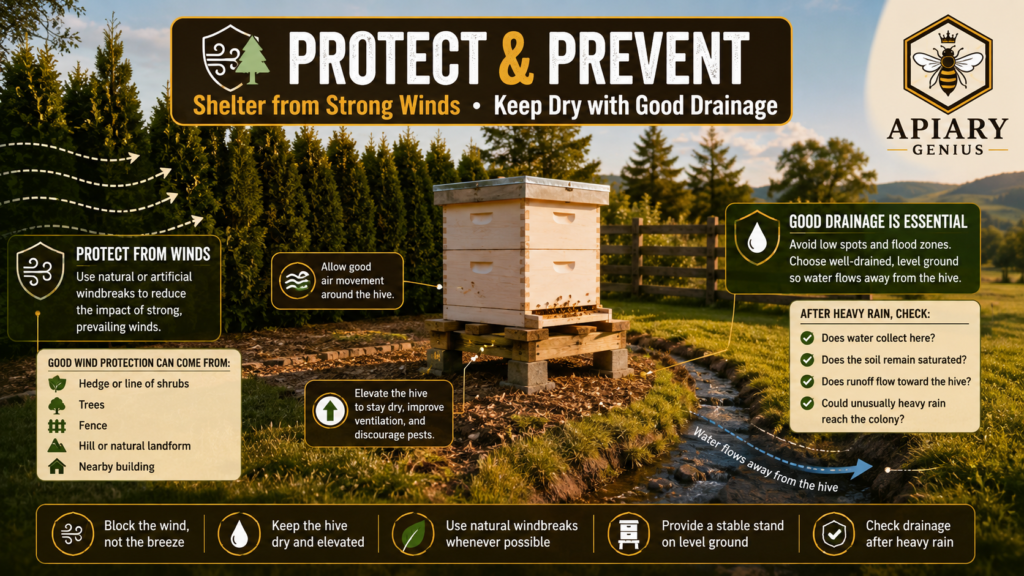
Wind exposure becomes particularly important during cold weather. A natural or artificial windbreak can reduce direct exposure without enclosing the colony completely.
Useful wind protection may come from:
- a hedge or line of shrubs
- trees
- a fence
- a hill or natural landform
- a nearby building
The goal is not to seal the hive into a windless corner. Good air movement around the apiary is still desirable. Instead, protect it from the strongest prevailing winds, especially during winter.
Be careful when using solid structures as windbreaks. The hive still needs adequate working space, and the location should not trap excessive moisture or create an awkward area for inspections.
Exposed hilltops are often poor choices even when they receive excellent sunlight. A slightly more sheltered location with good drainage may offer a better overall balance.
Keep the Hive Dry With Good Drainage
A dry location is one of the most important characteristics of a good apiary site.
Avoid obvious flood zones, low points where rainwater collects, and areas that remain muddy long after surrounding ground has dried. A location beside a stream or river may look attractive during dry weather but become dangerous during seasonal flooding.
Look at the property after heavy rain if possible.
Ask yourself:
Does water collect here?
Does the soil remain saturated?
Does runoff flow toward the hive?
Could unusually heavy rain reach the colony?
The hive itself should also be supported by a stable hive stand or suitable base rather than sitting directly on damp ground. Raising it makes the colony easier to work and separates wooden hive components from direct soil contact.
The stand needs to remain level and stable under substantial weight. A productive colony containing multiple boxes and stored honey can become far heavier than an empty hive.
Good drainage should therefore be evaluated before the bees are installed—not after a heavy colony is already established.
Choose the Best Direction for the Hive Entrance
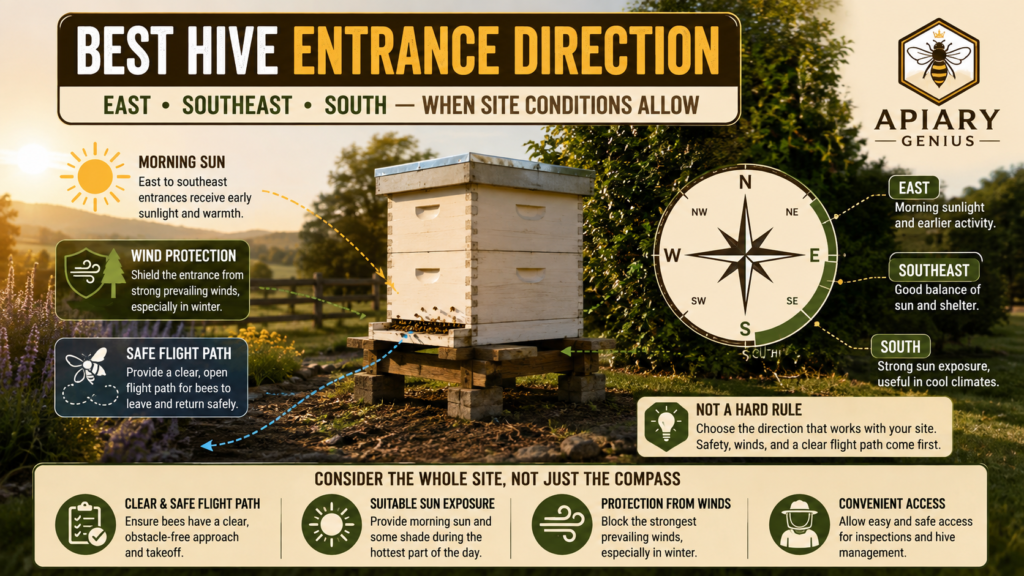
East, southeast, and south are commonly recommended directions for hive entrances.
Mississippi State University Extension notes that hive entrances oriented between south and east can benefit from earlier morning activity and solar exposure.
An east-facing entrance receives sunlight earlier in the morning. A southern exposure can provide greater solar exposure, which may be particularly useful during cooler months and in cooler climates.
But the “best” compass direction is not absolute.
Imagine that southeast points directly toward your neighbor’s patio while east points toward an open section of your own property. Choosing the theoretically ideal compass direction would make little sense if it creates an unsafe or inconvenient flight path.
The same principle applies if one orientation exposes the entrance directly to prevailing winter winds.
Use direction as one part of the decision rather than the entire decision.
When possible, choose an east-to-south orientation that also provides:
- a clear and safe flight path
- suitable sun exposure
- protection from severe prevailing winds
- convenient access for inspections
Safety and overall site quality should take priority over achieving a precise compass bearing.
Make Sure Bees Have Access to Water and Forage
A beautiful hive location will not compensate for an environment with inadequate resources.
Honey bees need water as well as nectar and pollen. Workers can forage over substantial distances, but having useful resources in the surrounding landscape reduces unnecessary travel and supports colony activity.
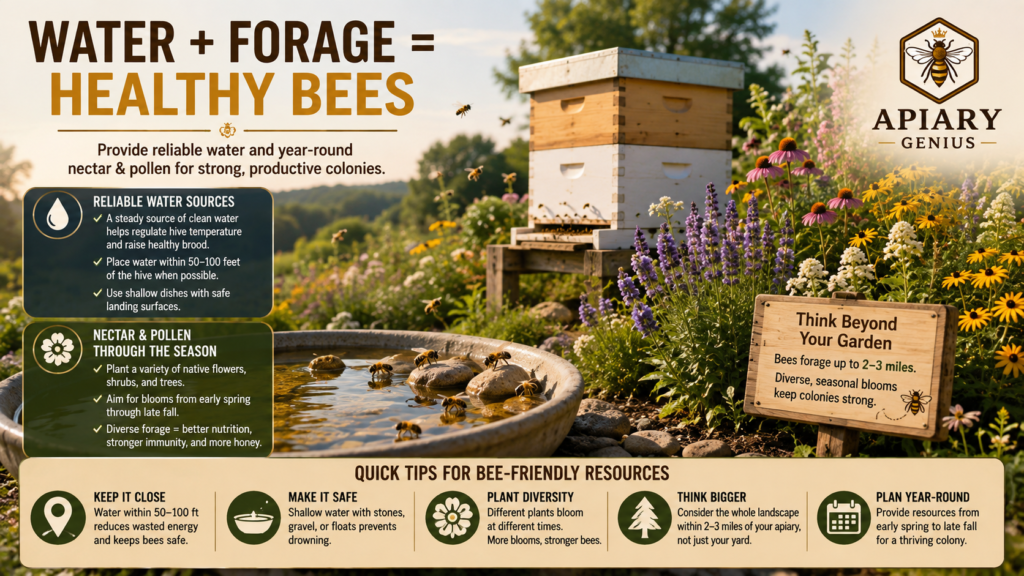
Reliable Water Sources
Water serves several functions in a honey bee colony, including helping bees regulate hive temperature and prepare food for brood.
If a dependable natural source is not appropriately available, providing water near the apiary can be especially useful.
This becomes even more important in residential areas.
Without a convenient water source, bees may discover alternatives that people would rather they avoid, including swimming pools, birdbaths, pet water dishes, leaking faucets, or a neighbor’s irrigation system.
Once bees become accustomed to a particular water source, persuading them to switch can be difficult.
If you provide water, establish it early—ideally before or when the bees are installed. Use a setup that gives bees safe landing surfaces so they can drink without easily drowning. Stones, gravel, floats, or other suitable landing areas can help.
Keep the source maintained so the bees can depend on it.
Nectar and Pollen Through the Season
Forage is not simply about having flowers visible beside the hive.
Bees need access to pollen and nectar sources across the active season, and the availability of those resources changes as different plants bloom.
Evaluate the broader landscape rather than just your garden.
Nearby resources may include:
- flowering trees
- wildflowers
- gardens
- orchards
- hedgerows
- pasture plants
- agricultural crops
Diversity is valuable because a landscape dependent on one major bloom can become much less productive when that flowering period ends.
Rural locations require another consideration: pesticide exposure. A hive beside abundant flowering crops may appear ideal, but repeated pesticide applications in the surrounding area can create significant risk to foraging bees.
If the proposed location is on or near actively managed farmland, learn how neighboring crops are treated and communicate with landowners or growers when possible.
Plan a Safe Flight Path for the Bees
One of the easiest hive-placement mistakes to make is thinking only about where the wooden hive sits.
You also need to think about the airspace in front of it.
Workers leaving the entrance establish regular routes between the colony and surrounding resources. You do not want that traffic moving at head height across a patio, sidewalk, doorway, driveway, children’s play area, animal enclosure, or another frequently used space.
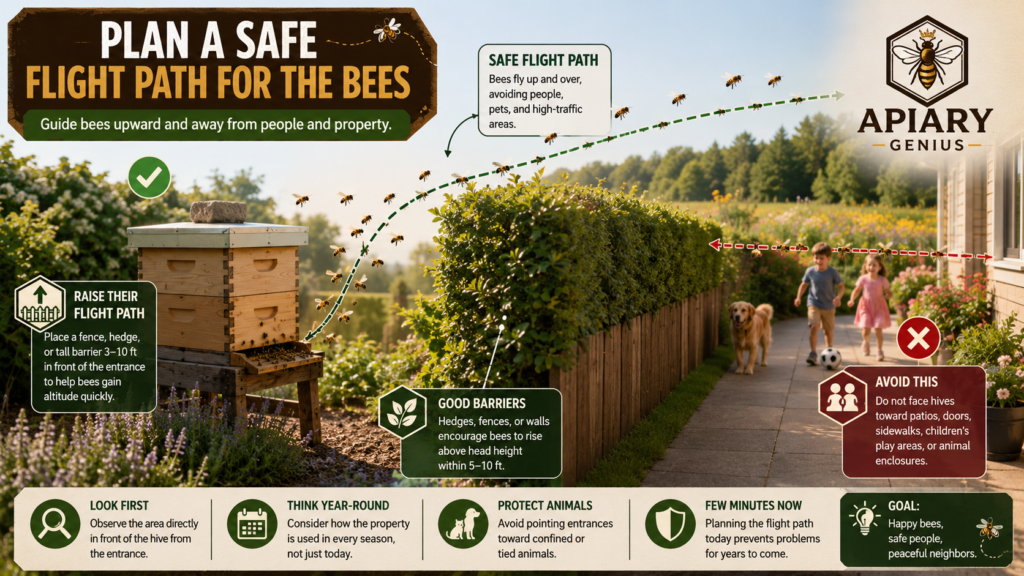
Stand at the proposed location and look straight out from the entrance.
What is in front of you?
Then consider not only how the property is used today, but how it will be used throughout the year.
In confined residential spaces, a tall fence, hedge, or similar barrier positioned appropriately in front of the hive can encourage departing bees to gain altitude quickly. This can reduce encounters between bees and people on the other side.
A barrier does not make an otherwise dangerous location automatically acceptable, but it can improve a site where space is limited.
Also avoid directing entrances toward confined animals. An animal tied, penned, or otherwise unable to move away from defensive bees is particularly vulnerable if a colony becomes disturbed.
A few minutes spent visualizing bee traffic before installing the colony can prevent years of unnecessary conflict.
Make the Hive Easy for You to Reach and Inspect
Beginners naturally concentrate on what bees need and sometimes forget that they must work the hive themselves.
You need enough room beside and behind the hive to inspect it comfortably. Avoid squeezing the colony tightly between a wall, fence, dense vegetation, or other obstacles.
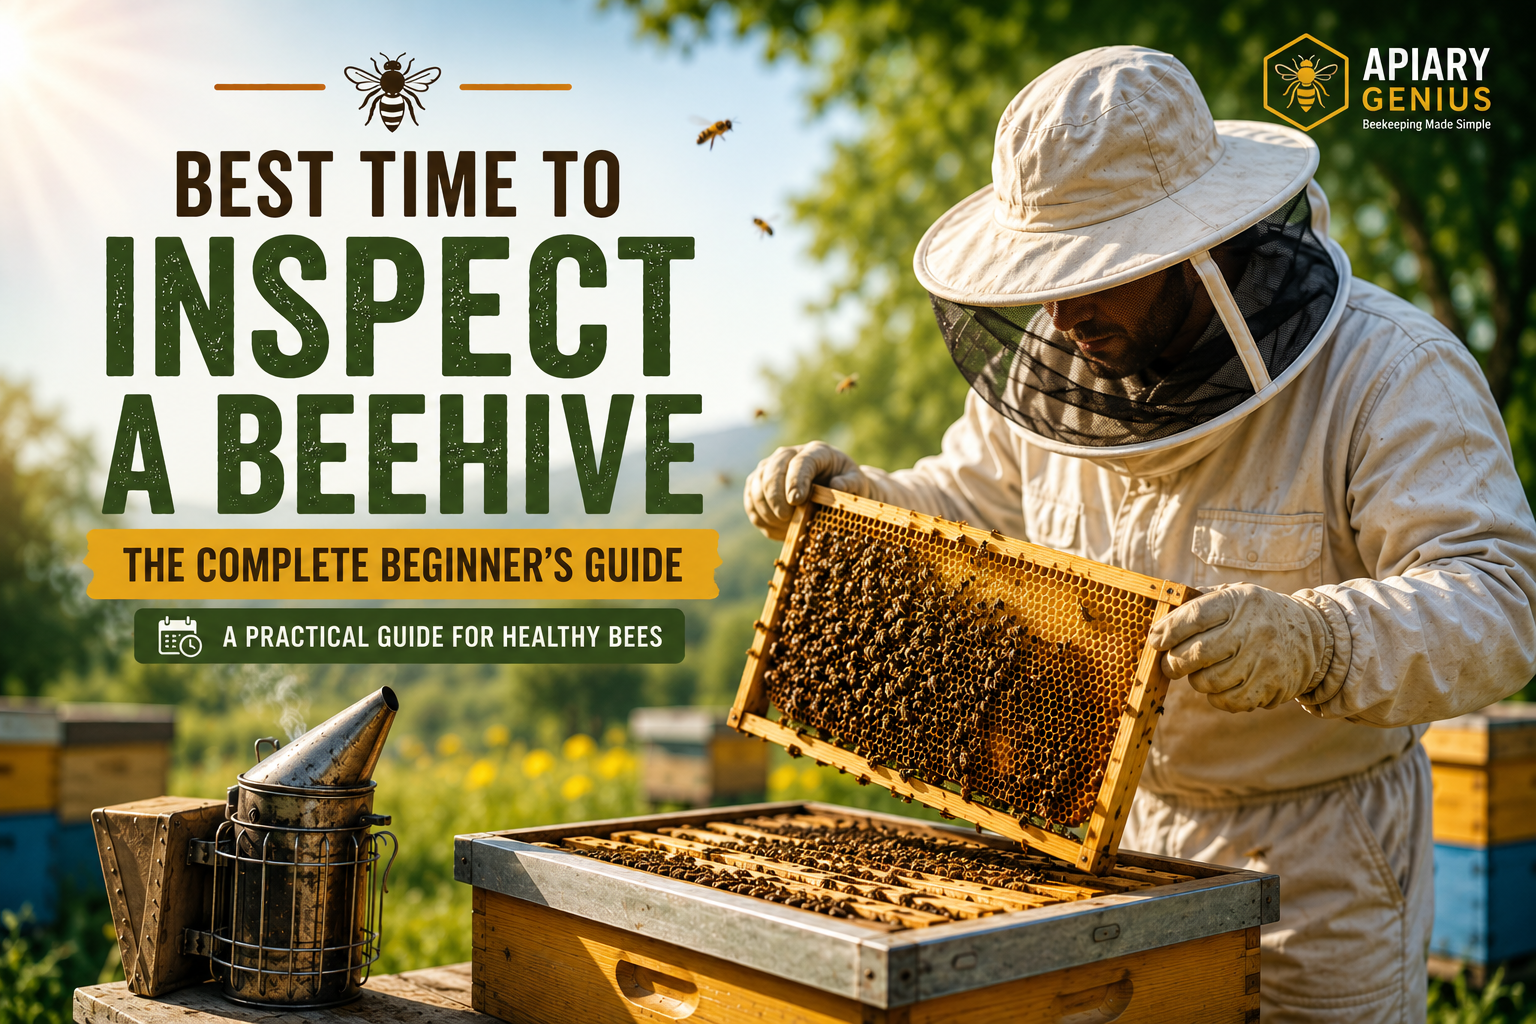
Think about the complete inspection process.
You may need to remove the outer cover, lift boxes, temporarily place equipment nearby, pull frames, use a smoker, feed the colony, perform pest monitoring, or carry honey supers away from the apiary.
A narrow corner that fits one empty hive may not provide enough working space once the colony grows.
Access is particularly important during honey harvest. A full honey super can be heavy, and carrying it a long distance over uneven ground is very different from carrying an empty box.
For rural apiaries, consider vehicle access as well. A beautiful site far across a muddy field may become difficult to reach after rain or during poor weather.
The ideal location is therefore not merely accessible on the sunny day when you install the hive. It should remain reasonably accessible throughout the beekeeping season.
Consider Neighbors, Property Lines, and Local Beekeeping Rules
Before installing bees, check the rules that apply specifically to your location.
Beekeeping requirements vary considerably between countries, states, counties, municipalities, and other local jurisdictions. Depending on where you live, regulations may address issues such as:
- hive registration
- number of colonies
- distance from property lines
- distance from roads or sidewalks
- water availability
- flyway barriers
- placement on residential property
Do not assume that a distance or hive-number recommendation found online applies legally to your property.
Check with the appropriate local authority or beekeeping organization before purchasing or installing colonies.
Even where your proposed location is completely legal, consider your neighbors.
A hive placed unnecessarily close to a property boundary can create concern even when the bees cause few actual problems. Moving the colony farther into your property, screening it with vegetation, providing your own water source, and directing flight paths away from neighboring spaces can reduce potential conflicts.
Responsible urban and suburban beekeeping depends on more than simply complying with the minimum legal requirements.
How to Choose a Beehive Location in Different Settings
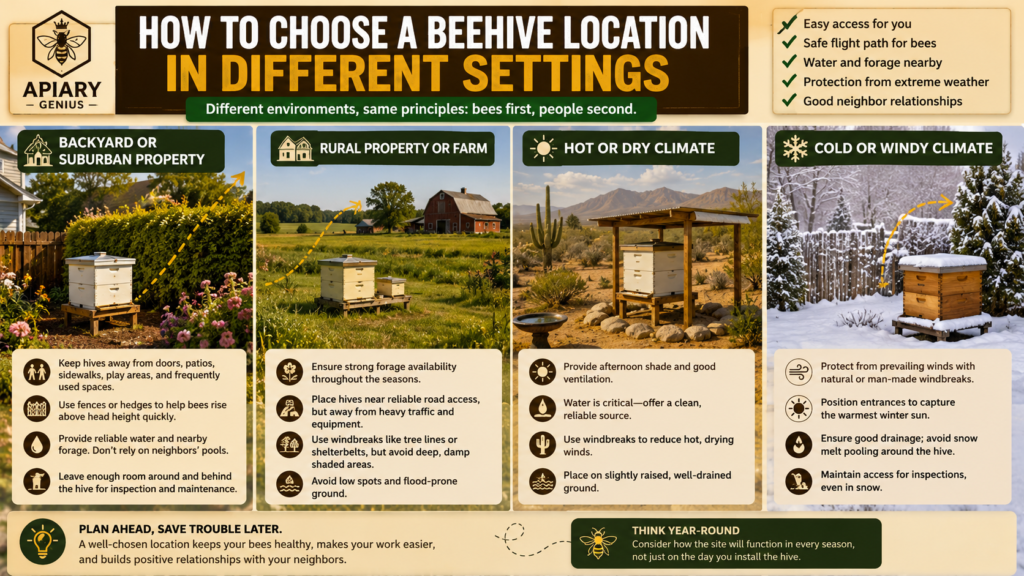
The same basic placement principles apply almost everywhere, but their priority changes with the environment.
A useful way to choose between several possible sites is to identify the greatest local risks first.
Backyard or Suburban Property
In a backyard, human activity is often the biggest constraint.
Prioritize a location that directs bees away from doors, patios, sidewalks, play areas, neighboring properties, and places frequently used by pets.
A fence or hedge may help raise the bees’ flight path where space is limited.
Reliable water is particularly important because you do not want the colony choosing a neighbor’s swimming pool as its preferred source.
You also need enough room to work behind and beside the hive without standing directly in the entrance flight path.
Finally, verify local rules before bringing bees onto the property.
Rural Property or Farm
Rural beekeepers often have more space, but more space does not automatically mean every location is suitable.
Forage availability becomes a major consideration, along with reliable road or vehicle access. Avoid placing an apiary somewhere that becomes unreachable after heavy rain.
Consider agricultural activity around the proposed site. Fields may be sprayed, harvested, plowed, irrigated, or accessed by heavy machinery. A location should protect both the bees and the people operating equipment nearby.
Natural windbreaks such as tree lines can be useful, provided the colonies are not placed in deep, damp shade.
Also avoid flood-prone low ground simply because it is unused by the farm.
Hot or Dry Climate
In a hot climate, extreme afternoon heat deserves additional attention.
Morning sun can still be beneficial, but a site with some protection from the most intense afternoon sun may reduce heat stress during the hottest part of the season.
Reliable water becomes especially important because bees use water as part of colony cooling.
At the same time, do not place the hive in a permanently dark, poorly ventilated corner simply to create shade.
The best solution is usually balance: morning light, adequate airflow, dependable water, and reasonable protection from extreme afternoon exposure where local conditions require it.
Cold or Windy Climate
In colder regions, sunlight and wind protection become higher priorities.
A southern or southeastern exposure can help increase solar warming, while a hedge, tree line, fence, building, or natural landform can protect colonies from prevailing winter winds.
Avoid low, damp pockets where cold air and moisture collect.
Winter access should also be considered. A location that is convenient during summer may become difficult to reach after snow, prolonged rain, or frozen conditions.
The goal is a dry, sheltered site that receives useful sunlight without sacrificing ventilation.
Common Beehive Placement Mistakes to Avoid
Many poor hive locations look perfectly reasonable when the equipment is empty.
Problems become obvious only later, after bees have established themselves and moving the colony becomes more complicated.
One common mistake is choosing deep shade because it seems sheltered. Excessive shade can leave an apiary cool and damp and may create conditions that are less desirable for managed colonies.
Another is placing the hive on wet or flood-prone ground. Always evaluate drainage before installation.
Do not point the entrance directly toward a busy human or animal area simply because that direction provides ideal morning sunlight. A safe flight path matters more than perfect compass orientation.
Avoid locations with strong, direct prevailing winds, especially in cold climates.
Do not forget your own access. If you cannot comfortably stand behind the colony, remove boxes, or carry equipment to and from the site, the location will become frustrating as the colony grows.
Another mistake is choosing a location based on summer conditions alone. Observe how sunlight, wind, water, vegetation, and access may change throughout the year.
Finally, do not install bees before checking local regulations. Finding out afterward that a hive violates a setback, registration requirement, or other local rule can force you to relocate an established colony.
Final Beehive Location Checklist
Before installing your hive, walk through this checklist at the proposed site.
Sunlight
- Does the location receive useful morning sunlight?
- Is there reasonable protection from extreme afternoon heat if your climate requires it?
- Is the site free from permanent deep shade?
Weather and ground
- Is the hive protected from strong prevailing winds?
- Is the ground dry and well drained?
- Is the site safely above known flood levels?
- Can the hive stand remain stable throughout the year?
Resources
- Is there adequate forage in the surrounding landscape?
- Are nectar and pollen sources reasonably diverse?
- Do the bees have a reliable water source?
- Is there significant nearby pesticide exposure that should influence your decision?
Safety
- Does the entrance face away from busy human and animal areas?
- Can bees leave the hive without crossing a frequently used space at head height?
- Could a fence or hedge improve the flight path if necessary?
- Is the hive reasonably separated from neighboring activity?
Beekeeper access
- Can you comfortably stand beside and behind the hive?
- Is there room to remove and temporarily place boxes during inspections?
- Can you carry heavy equipment and honey supers to and from the site?
- Will the location remain accessible after rain or during seasonal weather?
Legal considerations
- Is beekeeping permitted at the property?
- Have you checked applicable local regulations?
- Are there registration, setback, hive-number, or flyway-barrier requirements?
If a proposed location performs well in all of these categories, you probably have a strong candidate.
Do not reject an otherwise excellent location simply because it does not satisfy one popular rule, such as facing the entrance at an exact compass angle. Hive placement is a balancing decision.
A dry site with morning sun, wind protection, reliable resources, a safe flight path, and convenient access is far more valuable than a location selected according to one rule while ignoring everything else.
Choose carefully before the colony arrives. A few extra minutes spent evaluating the site now can make hive management easier for you and provide a more suitable environment for your bees for years to come.